Understanding how to hook up an RV battery can be confusing. A clear wiring diagram is essential.
It helps ensure safety and efficiency. In this guide, we dive into the details of RV battery hook-up diagrams. Whether you’re a seasoned RV enthusiast or a beginner, knowing how to properly connect your RV battery is crucial. A wiring diagram simplifies this task, making it easier to follow and understand.
We’ll explore the components, connections, and steps involved. By the end, you’ll have a clear picture of how to safely wire your RV battery. This knowledge ensures your RV is ready for any adventure, providing reliable power wherever you go. Let’s get started on making your RV battery setup simple and stress-free.
Introduction To Rv Battery Hook Up
Understanding the wiring diagram for an RV battery hook up is essential. It ensures your RV runs smoothly and safely. Whether you are a seasoned RV owner or a newbie, knowing how to connect your RV battery is crucial.
Properly wiring your RV battery can extend its lifespan. It also helps in avoiding potential electrical issues. Let’s dive into the importance of proper wiring and common mistakes to avoid.
Importance Of Proper Wiring
Proper wiring of your RV battery ensures efficiency. It helps in maintaining a steady power supply. This is vital for the appliances and systems in your RV. Correct wiring also prevents overheating. Overheating can lead to damage or even fire.
Using the right gauge wire is important. It ensures that the current flows smoothly. A proper connection also reduces the risk of short circuits. Short circuits can damage the battery and other electrical components.
Common Mistakes To Avoid
One common mistake is using the wrong wire gauge. This can cause overheating and potential damage. Another mistake is poor connection. Loose or corroded connections can disrupt the power flow.
Some people forget to check the polarity. Connecting the battery terminals incorrectly can cause serious damage. It is also important to secure the battery properly. A loose battery can create safety hazards.
Always follow the manufacturer’s instructions. Each RV model may have specific wiring requirements. Ignoring these instructions can lead to problems down the line.
Types Of Rv Batteries
Understanding the types of RV batteries is crucial for a reliable power setup. Different types offer various benefits and have unique characteristics. Below, we explore the most common RV batteries.
Lead-acid Batteries
Lead-acid batteries are the most common in RVs. They are affordable and widely available. These batteries have a shorter lifespan compared to others. Regular maintenance is essential. They require checking the water levels and cleaning the terminals. Lead-acid batteries can handle deep discharges. They are heavy, which can affect your RV’s weight capacity.
Lithium-ion Batteries
Lithium-ion batteries are becoming more popular in RVs. They are lighter and more efficient than lead-acid batteries. These batteries have a longer lifespan. They can be discharged deeper without damage. Lithium-ion batteries are more expensive. However, their benefits often outweigh the cost. They require less maintenance and offer better performance.
Essential Tools And Materials
Setting up your RV battery can seem daunting, but with the right tools and materials, the process becomes straightforward. This section will guide you through the essential tools and materials needed for a smooth installation of your RV battery wiring diagram.
Required Tools
For a successful RV battery hookup, gather the following tools:
- Wire Strippers: Essential for removing insulation from the wires.
- Multimeter: Used to measure voltage and ensure connections are correct.
- Screwdrivers: Both flathead and Phillips for various screw types.
- Crimping Tool: Needed for securing wire connectors.
- Wrenches: Different sizes for tightening nuts and bolts.
- Heat Gun: Used for shrinking heat shrink tubing.
Necessary Materials
Gather these materials to ensure a seamless RV battery hookup:
- Battery Cables: Choose the correct gauge for your setup.
- Heat Shrink Tubing: Protects wire connections from the elements.
- Wire Connectors: For secure and stable electrical connections.
- Electrical Tape: Insulates and secures wire connections.
- Terminal Lugs: Connects cables to battery terminals securely.
- Battery Terminal Covers: Prevents accidental short circuits.
Having these tools and materials on hand will make your RV battery setup easier. Proper preparation can save time and prevent mistakes.

Credit: five2go.com
Safety Precautions
When setting up an RV battery, safety should be your top priority. Following proper safety precautions can prevent accidents and ensure a smooth process. Let’s explore some essential safety tips for wiring your RV battery.
Safety Gear
Wearing the right safety gear is crucial. Always use insulated gloves to protect your hands from electric shocks. Safety goggles shield your eyes from sparks and debris. A long-sleeved shirt can protect your skin from potential burns.
Handling Precautions
Always disconnect the negative terminal first. This reduces the risk of short circuits. Ensure the battery is on a stable surface to prevent it from tipping over. Never work on the battery while it’s charging. This can be dangerous. Keep metal tools away from the battery terminals. They can cause sparks if they make contact.
Step-by-step Wiring Guide
Understanding how to hook up your RV battery can seem challenging. This step-by-step wiring guide will help you. Follow the steps below to ensure a safe and secure connection.
Preparing The Battery
First, gather your tools and materials. You will need a wrench, wire cutters, and battery cables. Inspect your battery for any signs of damage or corrosion.
Use a wire brush to clean the battery terminals. A clean connection ensures better conductivity. Wear safety gloves and goggles to protect yourself.
Connecting The Cables
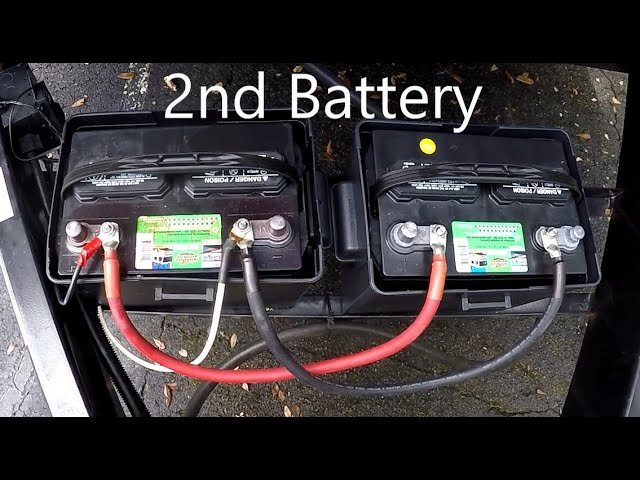
Next, identify the positive and negative terminals. The positive terminal is usually marked with a plus sign (+) and may have a red cover. The negative terminal is marked with a minus sign (-) and may have a black cover.
Attach the positive cable first. Secure it to the positive terminal using a wrench. Make sure the connection is tight. Then, attach the negative cable to the negative terminal in the same manner.
Final Checks
After connecting the cables, double-check your work. Ensure both cables are securely attached and there are no loose connections. Inspect for any signs of wear or damage.
Turn on your RV to test the battery. If everything is working properly, your wiring is complete. If you encounter any issues, review the steps above and make sure each connection is secure.
Following these steps will ensure your RV battery is hooked up correctly. Enjoy your travels with peace of mind knowing your battery is properly wired.

Credit: www.pinterest.com
Wiring Diagram Explanation
A wiring diagram for your RV battery hook-up is like a map. It shows you how to connect the wires to the battery. Understanding this diagram is important to avoid mistakes. It ensures your RV gets power safely and efficiently.
Reading The Diagram
First, learn to read the wiring diagram. Look at the symbols and lines. Each symbol represents a different part of the electrical system. The lines show how these parts connect.
The diagram usually starts at the battery. From there, it shows how electricity flows through the RV. Follow the lines to see where each wire goes. This helps you understand the path of the current.
Identifying Key Components
Next, identify the key components in the wiring diagram. Here are some of the most important parts:
- Battery: The source of power for your RV.
- Fuse: Protects the electrical system from overloads.
- Converter: Changes AC power to DC power for the battery.
- Inverter: Changes DC power back to AC power for appliances.
- Ground Wire: Provides a safe path for electricity to follow in case of a fault.
These components work together to supply power to your RV. Knowing each part helps you understand their roles.
| Component | Function |
|---|---|
| Battery | Powers the RV |
| Fuse | Protects from overload |
| Converter | Changes AC to DC |
| Inverter | Changes DC to AC |
| Ground Wire | Provides a safety path |
Understanding these parts and their functions will help you read the wiring diagram with ease. This knowledge ensures you can safely and effectively hook up your RV battery.
Troubleshooting Common Issues
Wiring diagrams for RV battery hook-ups are essential for every RV owner. They help ensure the electrical system functions smoothly. But sometimes, issues arise that may seem daunting. Here, we will discuss some common problems and how to troubleshoot them.
Battery Not Charging
One of the most common issues RV owners face is the battery not charging. There are several reasons why this might happen. Start by checking the battery connections. Ensure they are tight and free from corrosion. Loose or corroded connections can prevent the battery from charging properly.
Next, examine the fuse box. A blown fuse can stop the charging process. Replace any blown fuses and check if the battery starts charging.
If the connections and fuses are fine, the charger itself might be the issue. Use a multimeter to test the charger. If the charger is faulty, consider replacing it.
Lastly, check the battery condition. An old or damaged battery might not hold a charge. If the battery is old, replacing it might be the best solution.
Voltage Drops
Voltage drops are another common issue in RV battery systems. A significant drop can affect the performance of your electrical devices. Start by checking for loose connections. Loose or frayed wires can cause voltage drops. Tighten or replace any loose wires.
Another reason for voltage drops could be faulty wiring. Inspect the wiring for any signs of damage. Replace any damaged wires to ensure a stable voltage.
High electrical demand can also cause voltage drops. If you have too many devices running simultaneously, the system might struggle. Consider reducing the load by turning off some devices.
Lastly, use a voltage regulator. A regulator can help maintain a consistent voltage level. It can prevent significant drops, ensuring your devices run smoothly.
| Issue | Possible Cause | Solution |
|---|---|---|
| Battery Not Charging | Loose Connections | Tighten Connections |
| Battery Not Charging | Blown Fuse | Replace Fuse |
| Battery Not Charging | Faulty Charger | Test and Replace Charger |
| Voltage Drops | Loose Connections | Tighten or Replace Wires |
| Voltage Drops | High Electrical Demand | Reduce Load |
Maintenance Tips
Proper maintenance of your RV battery hookup ensures reliable performance. Regular care can prevent issues and extend battery life. Below are some essential tips to keep your RV battery in top condition.
Regular Inspections
Check your RV battery regularly. Inspect for any signs of wear or damage. Look for cracks, leaks, or bulging. These signs indicate potential problems. Address them immediately to avoid further issues.
Check the battery’s charge level often. Ensure it stays within the recommended range. Undercharging or overcharging can harm the battery. Use a multimeter to check the voltage accurately.
Cleaning The Terminals
Clean battery terminals regularly. Corrosion can build up and affect performance. Use a mixture of baking soda and water. Apply it with a brush to remove any corrosion.
After cleaning, rinse with clean water. Dry thoroughly before reconnecting. Applying a thin layer of petroleum jelly helps prevent future corrosion. Regular cleaning ensures a good connection and efficient power flow.

Credit: www.youtube.com
Frequently Asked Questions
How Do I Hook Up An Rv Battery?
To hook up an RV battery, connect the positive cable to the positive terminal. Then, connect the negative cable to the negative terminal. Ensure all connections are secure.
What Tools Do I Need For Rv Battery Installation?
You need a wrench, battery terminal cleaner, and protective gloves. Additionally, you might need cable ties to secure wires.
How Can I Prevent Rv Battery Drain?
To prevent RV battery drain, disconnect the battery when not in use. Also, avoid running high-power appliances for long periods.
How Often Should I Check Rv Battery Connections?
Check RV battery connections monthly. Ensure terminals are clean and connections are tight. This helps maintain optimal performance.
Conclusion
Understanding RV battery wiring is crucial for safe travels. Proper connections prevent issues. Use the wiring diagram to guide your setup. Ensure all connections are secure. Double-check everything before hitting the road. This will help avoid electrical problems. Enjoy the freedom of RV adventures with confidence.
Safe travels!


