A dripping RV water heater pressure relief valve can be a worry. Is it a minor issue or a sign of a bigger problem?
Understanding why your RV water heater pressure relief valve drips is essential. This valve plays a key role in maintaining the safety and efficiency of your water heater. If it starts dripping, it could indicate high pressure or temperature inside the tank.
Sometimes, it might be a simple maintenance issue. Other times, it could signal a more serious problem that needs immediate attention. In this blog, we will explore the common causes of a dripping pressure relief valve, how to diagnose the problem, and the steps you can take to fix it. Stay tuned to learn how to keep your RV water heater in top shape.
Introduction To Rv Water Heater Issues
RV water heaters are essential for a comfortable trip. They provide hot water for showers, cooking, and cleaning. But sometimes, they can develop issues. One common problem is the pressure relief valve dripping. Understanding these issues can help you fix them quickly.
Common Problems
RV water heaters can face several problems. Here are some of the most common:
- Pressure relief valve dripping
- No hot water
- Water heater not igniting
- Strange noises from the heater
- Water leaks
Among these, pressure relief valve dripping is a frequent issue. It can occur for several reasons. Sometimes, it’s due to high pressure in the tank. Other times, it might be a faulty valve.
Importance Of Timely Fixes
Fixing RV water heater issues on time is crucial. Delaying repairs can lead to bigger problems. For example, a dripping valve can cause water damage. It can also waste water, which is precious in an RV.
Moreover, a malfunctioning water heater can affect your comfort. Imagine taking a cold shower on a chilly morning. Or not having hot water to wash dishes. Timely fixes ensure you have a smooth trip.
In summary, understanding and addressing RV water heater issues promptly is vital. It keeps your RV in good condition and ensures a pleasant journey.

Credit: structuretech.com
Identifying A Dripping Pressure Relief Valve
Identifying a dripping pressure relief valve on your RV water heater is crucial. This small issue can lead to bigger problems if not addressed promptly. Understanding the signs and potential causes can help you take the necessary steps to fix it.
Signs Of A Leak
A few signs can indicate a leaking pressure relief valve. Water dripping from the valve is the most obvious. You might also notice a wet area around the base of the valve. Sometimes, you may hear a hissing sound coming from the valve. This sound usually means that water is escaping under pressure.
Another sign is a drop in water pressure. If you notice a significant change in water flow, it could be a leak. Keep an eye out for any unusual water pooling near your RV water heater. These signs can help you identify a dripping valve early.
Potential Causes
Several factors can cause a pressure relief valve to drip. One common cause is high water pressure. If the pressure in the water heater is too high, the valve will release water to reduce it. This is a safety feature of the valve.
Another cause could be a faulty valve. Over time, the valve can wear out or become damaged. This can lead to leaks. Sediment buildup inside the water heater can also affect the valve. Sediment can block the valve, causing it to malfunction.
Temperature changes can also cause the valve to drip. If the water temperature is too high, the valve may open to release some pressure. Regular maintenance can help prevent these issues. Check your RV water heater and valve regularly to ensure they are in good condition.
Safety Precautions Before Repair
Working on your RV water heater can be a bit daunting. Taking the right safety precautions is crucial. This ensures you avoid accidents and injuries. Let’s go through the steps you need to follow before making any repairs.
Turn Off Water Supply
First, you need to turn off the water supply. Locate the main water valve of your RV. Turn it off completely. This stops water from flowing into the heater. It prevents any unexpected sprays or leaks while you work.
Relieve Pressure Safely
Next, relieve the pressure in the heater. Open a hot water tap inside your RV. Let the water run until it slows to a trickle. This helps release any built-up pressure. It makes the repair process safer and easier.

Credit: www.rvtravel.com
Tools And Materials Needed
Fixing a dripping RV water heater pressure relief valve is crucial. It ensures your system runs smoothly. You need certain tools and materials to complete this task efficiently.
Being prepared can save you time and effort. Let’s look at the essential tools and replacement parts needed for this job.
Essential Tools
These tools will help you fix the pressure relief valve:
- Adjustable wrench: For loosening and tightening connections.
- Screwdriver set: To remove and secure screws.
- Pipe thread sealant: To ensure a tight seal on connections.
- Bucket: To catch any water that might drip out.
- Rags: To clean up any spills.
Replacement Parts
Having the right replacement parts is key. Here are some parts you might need:
- New pressure relief valve: Ensure it matches your heater’s specifications.
- Teflon tape: To help seal threaded connections.
- O-rings: In case the existing ones are worn out.
Gathering these tools and parts will make the repair smoother. It will also help you get back to enjoying your RV adventures.
Step-by-step Repair Guide
Experiencing a dripping pressure relief valve in your RV water heater can be frustrating. This guide will take you through a detailed process to fix the issue. Follow these steps to replace the old valve and install a new one.
Removing The Old Valve
- Turn off the power and water supply to the RV water heater. Safety first!
- Drain the water heater. Open the drain valve and let the water flow out completely.
- Locate the pressure relief valve. It is usually found on the top or side of the water heater.
- Use a wrench to carefully loosen and remove the old valve. Turn it counterclockwise.
- Inspect the valve opening. Clean any debris or sediment from the threads.
Installing The New Valve
- Wrap the threads of the new valve with Teflon tape. This ensures a tight seal.
- Carefully screw the new valve into the opening. Turn it clockwise.
- Use the wrench to tighten the valve. Do not overtighten to avoid damage.
- Turn on the water supply and fill the water heater. Check for any leaks around the new valve.
- Restore power to the water heater. Test the system by allowing it to heat up and checking for proper operation.
Follow these steps to ensure your RV water heater operates efficiently. A properly functioning pressure relief valve is crucial for safety and performance.

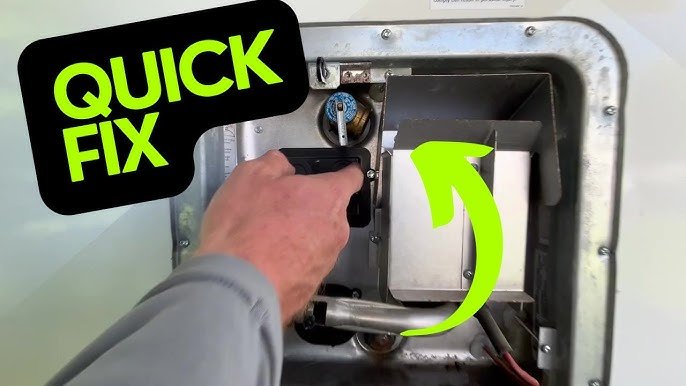
Credit: www.youtube.com
Testing The Repair
Water dripping from the RV water heater pressure relief valve often indicates a need for repair. Testing the repair ensures the valve functions correctly and prevents leaks.
After repairing your RV water heater pressure relief valve, it is important to test the repair. This ensures that the valve functions correctly and prevents any further issues. Follow these steps to verify the repair.Checking For Leaks
First, inspect the area around the pressure relief valve. Look for any signs of water dripping or pooling. Pay close attention to the valve and surrounding connections. A dry area indicates a successful repair.Next, gently touch the valve and connections. Feel for any moisture. Even a small amount of dampness can signal a problem. If you find any leaks, tighten the connections or reapply the repair.Restoring Water Supply
Once you confirm there are no leaks, restore the water supply to your RV. Turn on the water pump and open a nearby faucet. This helps to pressurize the system.Allow the water to run for a few minutes. This flushes out any air trapped in the lines. Watch the pressure relief valve during this time. Ensure there are no drips or leaks.Finally, close the faucet and listen for any unusual sounds from the water heater. If everything seems normal, the repair is complete. Enjoy the peace of mind knowing your RV water heater is in good working order. “`Preventative Maintenance Tips
Preventative maintenance of your RV water heater pressure relief valve ensures longevity. It also prevents unexpected problems. Simple checks and correct usage can make a big difference. Let’s explore some essential tips.
Regular Inspections
Inspect the pressure relief valve regularly. Look for any signs of wear. Check if the valve is dripping. A small drip can turn into a big leak. Address issues early. This prevents bigger problems later. Use a flashlight for better visibility.
Proper Usage
Always use your RV water heater correctly. Set the temperature as recommended. High temperatures increase pressure. This can cause the valve to drip. Follow the manufacturer’s guidelines. They provide the best settings. Avoid sudden temperature changes. This stresses the system.
When To Seek Professional Help
It can be challenging to know when to call a professional for your RV water heater pressure relief valve. If it is constantly dripping, there may be underlying issues that require expert intervention. Here’s when you should consider reaching out for professional assistance.
Complex Issues
Some problems with your RV water heater pressure relief valve can be complex. If you notice persistent dripping despite basic troubleshooting, the issue might be beyond simple fixes. Potential causes include:
- High pressure in the water system
- Temperature fluctuations
- Faulty installation
These issues often need specialized tools and knowledge. A professional can accurately diagnose and fix these complex problems, ensuring your RV water heater functions safely.
Warranty Considerations
If your RV water heater is under warranty, attempting DIY repairs might void it. Manufacturers often specify that only certified technicians should handle certain repairs. Always check the warranty terms before proceeding with any self-repair. Ensuring a professional handles the repair can keep your warranty intact and save you from unexpected costs.
| Scenario | Action |
|---|---|
| High pressure | Call a professional |
| Temperature issues | Seek expert help |
| Under warranty | Check warranty terms |
In summary, addressing complex issues and adhering to warranty terms are key reasons to seek professional help. Don’t hesitate to call an expert for your RV water heater pressure relief valve dripping concerns.
Conclusion And Final Thoughts
A dripping RV water heater pressure relief valve often signals an issue needing attention. Regular inspections and timely replacements can prevent potential problems. Proper maintenance ensures safe and efficient operation of your RV water heater.
Dripping from your RV water heater pressure relief valve can be concerning. It’s important to understand why it happens and how to fix it. Proper maintenance can prevent major issues. Let’s recap the essential points and stress the importance of timely repairs.Summarizing Key Points
A dripping pressure relief valve usually means there is excess pressure. It can also indicate a faulty valve. Regular checks can help spot issues early. Replacing a faulty valve is often a simple fix. Always follow the manufacturer’s guidelines for maintenance.Encouraging Timely Repairs
Do not ignore a dripping valve. Small leaks can lead to bigger problems. Timely repairs ensure your RV water heater works efficiently. It also prevents water damage. Regular maintenance saves time and money in the long run. Act promptly to keep your RV in good shape. “`Frequently Asked Questions
Why Is My Rv Water Heater Pressure Relief Valve Dripping?
A dripping pressure relief valve indicates excess pressure buildup in the water heater. This is often due to high temperature or pressure.
How Do I Fix A Dripping Rv Water Heater Valve?
First, check the temperature setting. Lower it if necessary. If dripping continues, the valve might need replacement.
Is A Dripping Rv Water Heater Valve Dangerous?
Yes, it can be. Excess pressure can cause damage or even lead to an explosion. Address it promptly.
Can I Replace The Rv Water Heater Valve Myself?
Yes, you can. Ensure the water heater is off and cooled down. Then, follow manufacturer instructions.
Conclusion
Addressing a dripping RV water heater pressure relief valve is crucial. It prevents water damage and ensures safety. Regular checks can save you from big problems later. Replace faulty valves promptly. Doing so keeps your RV in good condition. It also provides peace of mind during your travels.
Always prioritize maintenance for a hassle-free experience. Happy camping!


