Replacing an RV propane tank valve is essential for safety. A faulty valve can lead to leaks.
Understanding the replacement process ensures your camping trips stay safe and enjoyable. Propane tank valves play a crucial role in the safety and efficiency of your RV’s propane system. Over time, wear and tear or damage can cause these valves to malfunction, posing potential hazards.
Replacing a faulty valve is not only a matter of convenience but also a critical safety measure. This guide will help you understand the steps involved in replacing an RV propane tank valve, ensuring your peace of mind and a safe journey on the road. Whether you’re a seasoned RV owner or new to the lifestyle, knowing how to maintain your propane system is vital.
Tools Needed
Replacing an RV propane tank valve is a task that requires the right tools. Having the correct tools ensures safety and efficiency. Below is a list of essential and optional tools needed for this job.
Essential Tools
These tools are necessary for replacing the propane tank valve:
- Wrench set: Used to loosen and tighten the valve.
- Pipe wrench: Helps to grip and turn the valve.
- Safety gloves: Protects your hands during the replacement.
- Leak detection solution: Ensures there are no leaks after installation.
Optional Tools
These tools are not required but can make the job easier:
- Pipe tape: Provides a better seal on threaded connections.
- Adjustable wrench: Offers more flexibility for different sizes.
- Protective eyewear: Shields your eyes from debris.
- Flashlight: Useful for working in low light conditions.
Preparation
Replacing an RV propane tank valve requires proper preparation. Ensuring safety is the key. Before you begin, gather all necessary tools. This includes wrenches, gloves, and a new valve. Preparation can prevent accidents and make the job easier.
Turn Off Propane Supply
First, turn off the propane supply. Locate the main valve on the propane tank. Turn it clockwise until it stops. This will cut the gas flow. Use a wrench if the valve is tight. Ensure no gas is leaking. Listen for hissing sounds. Smell for gas odor. If you detect any, wait until it dissipates.
Ventilate The Area
Next, ventilate the area. Propane is heavier than air. It can settle in low areas. Open windows and doors of your RV. Use fans if available. This will help disperse any remaining gas. Proper ventilation reduces the risk of explosion. Work in a well-ventilated space for your safety.
Removing The Old Valve
Replacing the RV propane tank valve can seem daunting. But with the right steps, it becomes manageable. Removing the old valve is the first and crucial part of this process. Follow these steps to ensure a smooth removal.
Detach Tank From Rv
First, detach the propane tank from the RV. Make sure the tank is fully turned off. This step is crucial for safety. Next, disconnect the hose from the tank. Use a wrench if the connection is tight. Place the tank on a stable surface.
Unscrew The Old Valve
Now, unscrew the old valve. Use a pipe wrench for this task. Apply steady pressure to avoid damaging the tank. Turn the wrench counterclockwise to loosen the valve. Once loose, remove the valve by hand.
Inspect the tank opening for any debris. Clean it with a cloth if needed. This ensures a smooth installation of the new valve.
Inspecting The Tank
Ensuring your RV propane tank is in top condition is vital for safe travels. Before replacing the valve, inspect the tank thoroughly. This step helps identify any potential issues and ensures that the new valve will function correctly.
Check For Damage
Begin by examining the tank for any visible damage. Look for dents, rust, or corrosion on the surface. These issues can weaken the tank and cause leaks.
Use a flashlight to inspect hard-to-see areas. If you find any major damage, consider replacing the entire tank. Safety should always come first.
| Damage Type | Action Required |
|---|---|
| Small Dents | Monitor for changes |
| Rust | Clean and apply rust inhibitor |
| Major Corrosion | Replace tank |
Clean The Tank Threads
Next, focus on the tank threads. These threads need to be clean for the new valve to fit properly. Dirt and debris can prevent a secure connection and lead to leaks.
Use a wire brush to remove any dirt or rust. You can also use a thread cleaner to ensure the threads are in good condition.
- Brush off loose debris
- Apply a cleaning solvent if needed
- Wipe with a clean cloth
After cleaning, inspect the threads closely. They should be free of damage and in good shape. If you notice any issues, you may need to repair or replace the tank.
Installing The New Valve
Replacing the RV propane tank valve can seem daunting. But, with careful steps, it becomes manageable. Installing the new valve is critical. It ensures your propane system works safely. Below, we break down the steps for you.
Apply Thread Sealant
First, prepare the valve threads. Clean them thoroughly. Ensure no debris remains. This step is crucial. It helps the new valve fit perfectly.
Next, apply thread sealant. Use a high-quality sealant. Wrap it around the valve threads. Ensure even coverage. This prevents gas leaks. Be precise. Over-applying can cause issues.
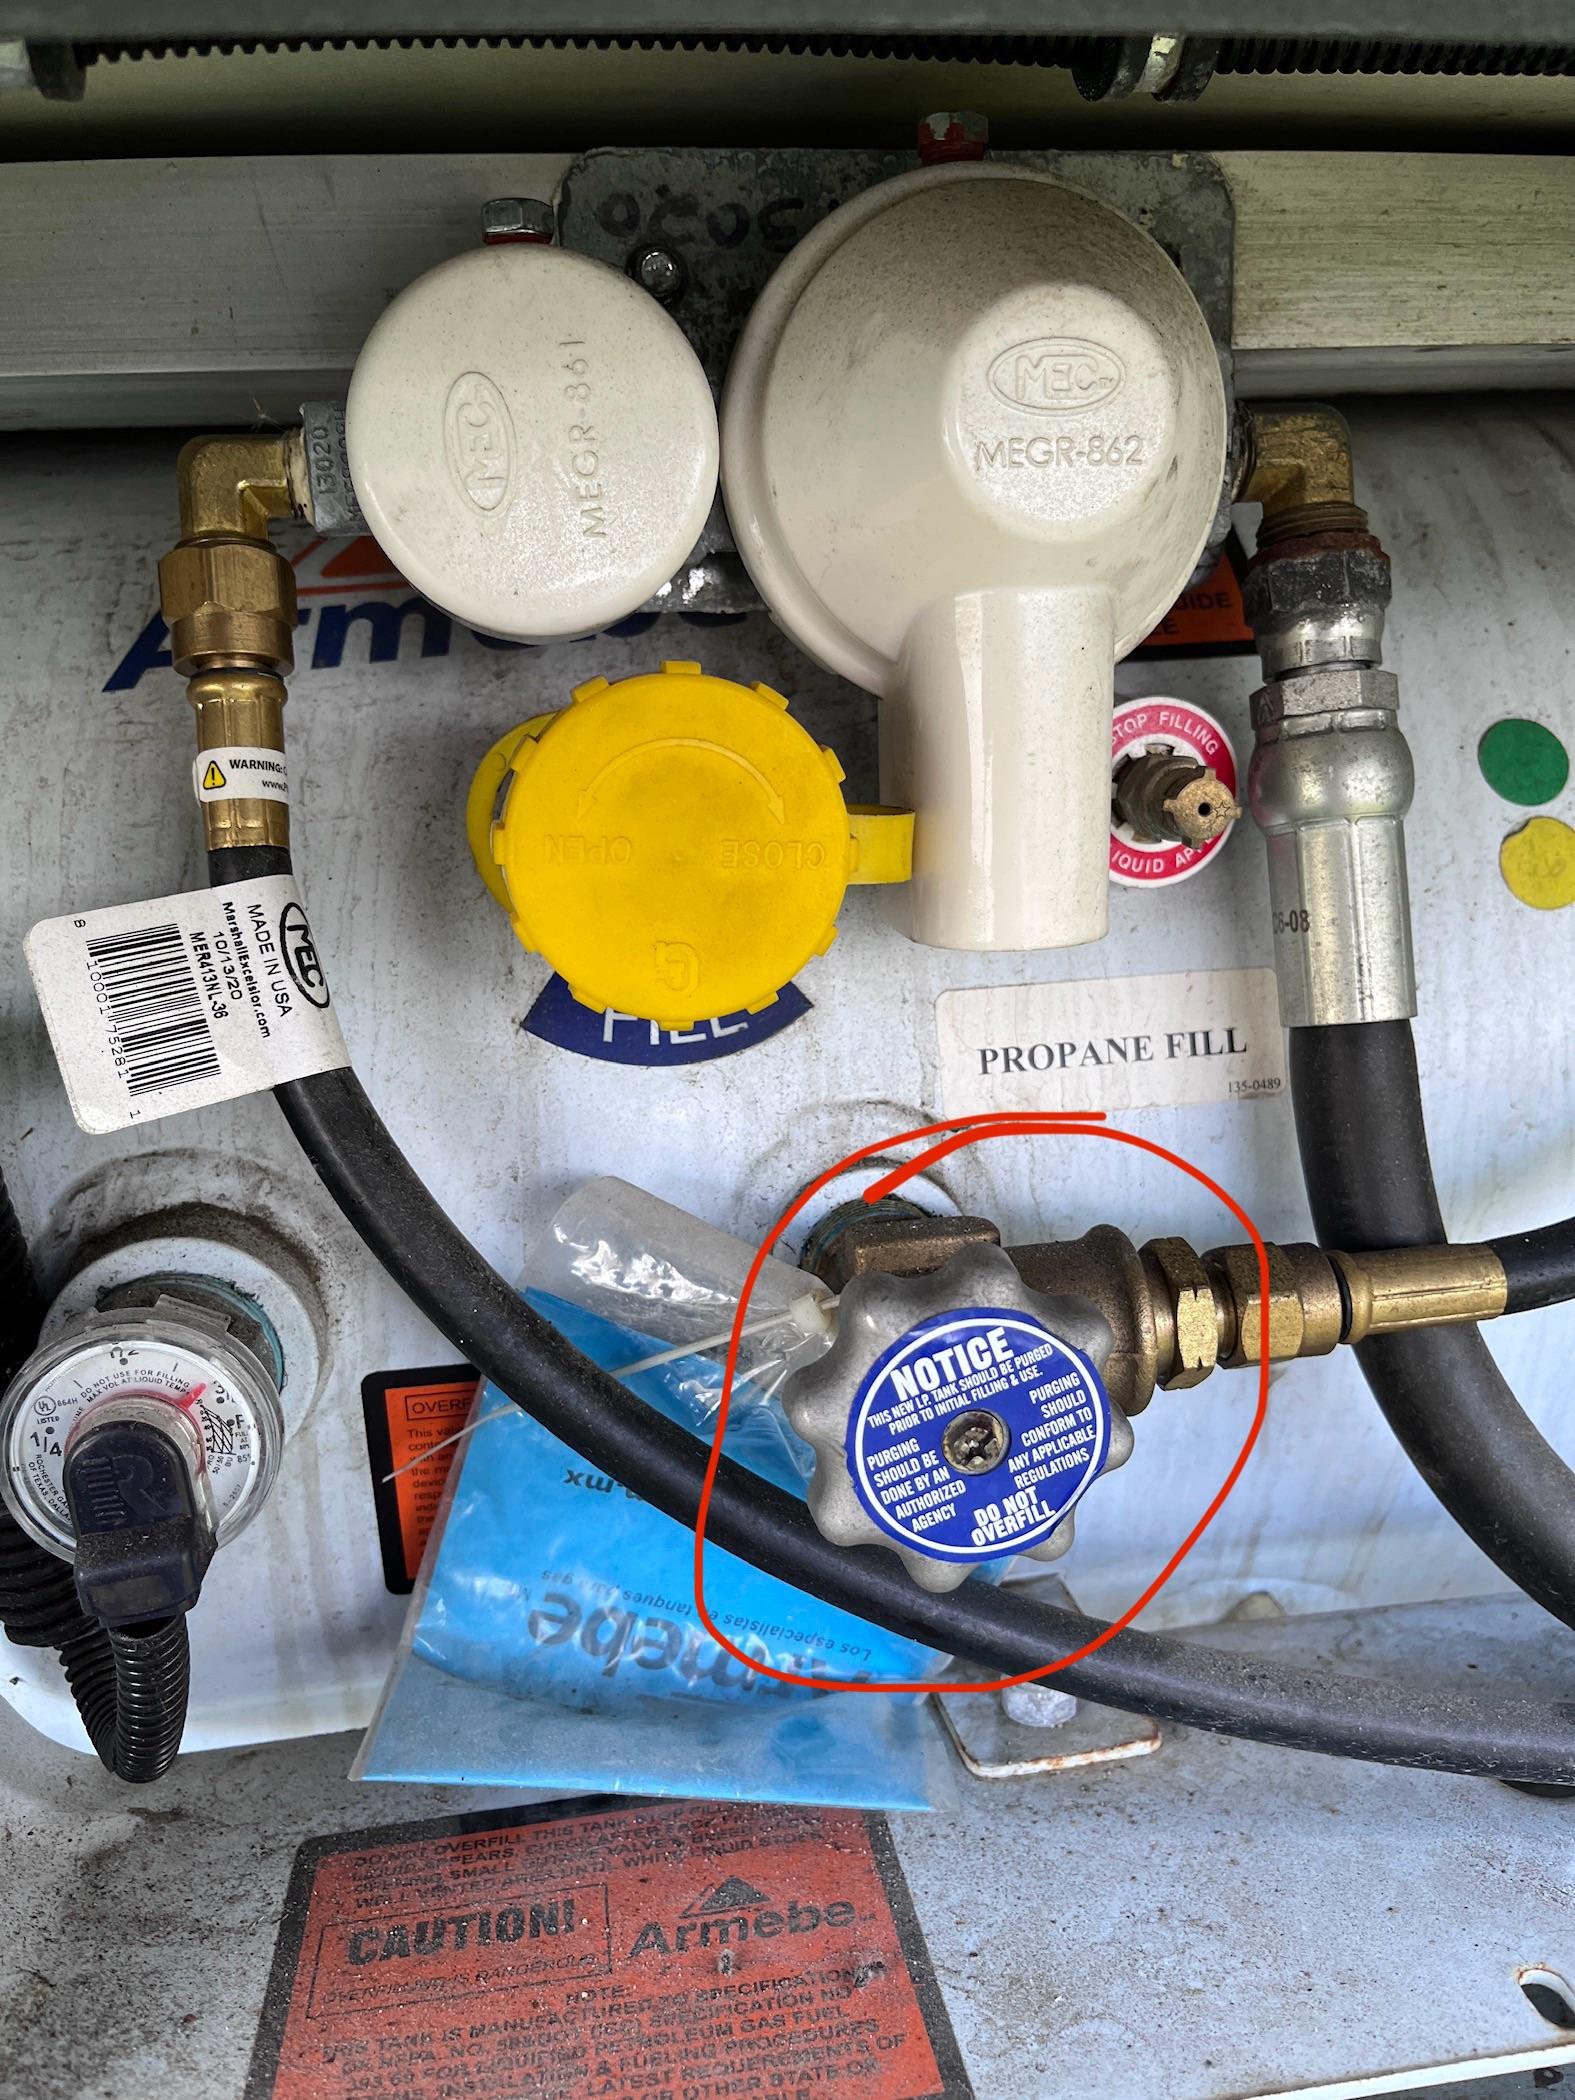
Screw In The New Valve
Now, position the new valve. Align it with the tank opening. Begin to screw it in by hand. Turn it clockwise. This ensures a snug fit.
Once it’s hand-tight, use a wrench. Tighten the valve further. Ensure it is secure, but do not over-tighten. Over-tightening can damage the valve.
Check your work. Ensure the valve is straight. Double-check the tightness. This ensures a secure connection.
Your new valve is now installed. Proceed with connecting your propane lines. Ensure all connections are tight. Test for leaks before using the system.
Testing The Installation
Testing the installation of your RV propane tank valve is crucial. It ensures the system works safely and efficiently. After replacing the valve, follow these steps to complete the process.
Check For Leaks
Begin by checking for leaks. Turn on the propane supply slightly. Use a soapy water solution to spray the valve connections. Bubbles will form if there are any leaks. If you see bubbles, turn off the supply immediately. Tighten the connections and test again.
Reconnect The Tank
Once you confirm there are no leaks, reconnect the tank. Ensure the valve is in the closed position before connecting. Securely attach the tank to the RV’s propane system. Open the valve slowly and listen for any hissing sounds. This can indicate a leak. If you hear any, repeat the leak test process.
After reconnecting, ensure all appliances are turned off. Turn on the propane supply fully. Test each appliance one by one to ensure proper functioning. This step verifies that the system is working correctly. Completing these tests ensures a safe and efficient propane system.
Final Steps
Ensure the area is well-ventilated. Turn off the gas and remove the old valve. Install the new valve securely.
Replacing the valve on your RV propane tank is almost complete. You’ve carefully followed each step. Now, it’s time to ensure everything works perfectly. This final section will guide you through the last essential tasks.
Turn On Propane Supply
First, turn on the propane supply slowly. This prevents sudden pressure changes. Rotate the valve counterclockwise. Listen for any unusual sounds. There should be no hissing or whistling noises. A quiet, steady flow means you’ve done it right.
Monitor For Issues
Once the propane supply is on, check for leaks. Use a soapy water solution. Spray it on the connections and valve. Bubbles indicate a leak. Tighten the connections and test again. Always trust your nose. The smell of propane means there’s a problem. If you smell gas, shut off the valve immediately. Ventilate the area and fix the issue before using your appliances. By following these steps, you ensure the safety of your RV propane system. Enjoy your travels with peace of mind. “`
Maintenance Tips
Maintaining your RV propane tank valve ensures safety and efficiency. Proper care prevents leaks and extends the lifespan of your tank. Below are some maintenance tips to keep your propane system in top shape.
Regular Inspections
Inspect your propane tank valve regularly. Check for cracks, rust, or any signs of wear. Look at the valve and surrounding area. Ensure there are no leaks or unusual smells. Use soapy water to detect leaks. If bubbles form, there’s a leak. Replace the valve immediately.
- Check the valve for damage.
- Look for rust or corrosion.
- Use soapy water to find leaks.
Regular inspections help identify issues early. This prevents potential problems on the road. Make it a habit to inspect your propane system monthly. This simple step ensures safety and peace of mind.
Proper Storage
Store your RV propane tank properly. Keep it in a cool, dry place. Avoid exposing it to direct sunlight. High temperatures can cause pressure to build up, leading to leaks. Always store the tank in an upright position. This prevents damage to the valve and ensures proper functioning.
| Dos | Don’ts |
|---|---|
| Store in a cool, dry place. | Do not expose to direct sunlight. |
| Keep the tank upright. | Do not store near flammable materials. |
| Check storage area for leaks. | Do not store in a hot environment. |
Proper storage prevents damage and ensures safety. Follow these tips to keep your propane system in good condition. Regular care and correct storage practices can extend the lifespan of your propane tank valve.

Credit: www.ebay.com
Frequently Asked Questions
How Do I Know If My Rv Propane Tank Valve Is Bad?
If you notice a gas leak, difficulty turning the valve, or inconsistent gas flow, the valve may be faulty. Regularly inspect for corrosion or damage.
Can I Replace An Rv Propane Tank Valve Myself?
Yes, you can replace it yourself. Ensure you follow safety precautions, and consult your RV’s manual for specific instructions.
What Tools Do I Need For Rv Propane Valve Replacement?
You need a wrench, Teflon tape, and a new valve. Always wear safety gloves and goggles during the replacement.
How Often Should Rv Propane Tank Valves Be Replaced?
RV propane tank valves should be replaced every 15 years or when you notice any signs of damage or malfunction.
Conclusion
Replacing your RV propane tank valve ensures safety and efficiency. It’s a straightforward task with the right tools. Regular maintenance prevents leaks and prolongs valve life. Always follow safety guidelines while working. This small effort keeps your RV adventures worry-free.
Enjoy your travels with peace of mind. Remember, a well-maintained valve means a safer trip. Make valve checks a routine part of your RV care. Safe travels!


