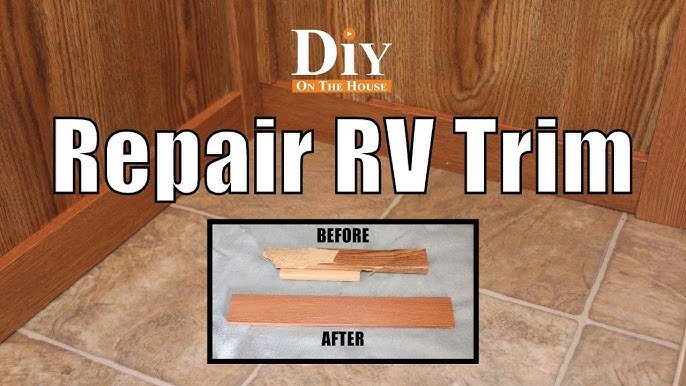
Are you tired of worn-out RV interior trim parts? Replacing them can refresh your RV’s look.
Quality trim parts can make a big difference in comfort and style. RV interior trim replacement parts come in all shapes and sizes. From window trims to door moldings, each piece plays a role in your RV’s aesthetic. Over time, these parts can wear out, crack, or fade.
Replacing them not only enhances the look but also improves the value of your RV. Whether you are restoring an old RV or updating a newer model, finding the right trim parts is essential. This guide will help you understand the options and find the best trim parts for your needs. Get ready to give your RV a fresh, stylish interior!
Introduction To Rv Interior Trim
RV interior trim plays a vital role in both aesthetics and functionality. It covers the edges and seams of various surfaces. This gives a finished look to your RV’s interior. Trim can enhance the visual appeal and protect surfaces from wear and tear.
Importance Of Trim
Trim provides a polished look to your RV’s interior. It hides raw edges and gaps between different materials. This can make your RV look more inviting. Trim also protects the edges of walls, cabinets, and floors. It helps to prevent damage from everyday use. Properly installed trim can improve the resale value of your RV.
Common Trim Materials
Several materials are used for RV interior trim. Wood is a popular choice for its natural look. It can be stained or painted to match your RV’s decor. Plastic trim is durable and easy to clean. It comes in various colors and finishes. Vinyl trim is flexible and water-resistant. It is ideal for areas prone to moisture, like bathrooms and kitchens. Metal trim is sturdy and adds a modern touch. It is often used for edging countertops and tables.

Credit: mountainmodernlife.com
Benefits Of Replacing Rv Trim
Replacing RV trim can bring numerous benefits to your recreational vehicle. Whether it’s for aesthetic purposes or practical reasons, updating the trim can have a significant impact. Below, we discuss some key advantages of replacing RV trim.
Enhance Aesthetic Appeal
One major advantage of replacing RV trim is the enhanced aesthetic appeal. New trim can transform the look of your RV’s interior.
- Fresh trim creates a cleaner, more modern look.
- It can match or complement your existing decor.
- New trim can hide any damage or wear from the old trim.
Choosing the right trim can make your RV feel more like home. Updated trim can also reflect your personal style.
Increase Resale Value
Replacing RV trim can also increase resale value. Potential buyers are often attracted to well-maintained interiors.
Here are some points to consider:
- Updated trim shows that the RV is well-cared for.
- It can make the interior look newer and more appealing.
- Quality trim materials can suggest a higher value.
Investing in new trim can pay off when you decide to sell. A small upgrade can make a big difference in the selling price.
Types Of Rv Interior Trim Parts
RV interior trim parts play a crucial role in enhancing the look and feel of your recreational vehicle. They provide a polished finish to various elements inside the RV. Knowing the different types of RV interior trim parts can help you make informed decisions when replacing or upgrading.
Window And Door Trim
Window and door trim are essential for creating a seamless and attractive transition between the walls and the windows or doors. These trims come in various materials, such as wood, plastic, or metal. They can be painted or stained to match your RV’s interior decor.
- Wood Trim: Offers a classic and warm look. It is durable but requires regular maintenance.
- Plastic Trim: Lightweight and easy to install. It is also resistant to moisture and insects.
- Metal Trim: Provides a modern and sleek appearance. It is highly durable and low maintenance.
Choosing the right trim can significantly enhance your RV’s interior. It also protects the edges of windows and doors from damage.
Ceiling And Floor Trim
Ceiling and floor trim are vital for covering gaps and joints where the ceiling meets the walls or where the floor meets the walls. They add a finished look and protect these areas from wear and tear.
| Type | Features |
|---|---|
| Ceiling Trim | Covers gaps between the ceiling and walls. Helps hide imperfections and wiring. |
| Floor Trim | Protects the base of the walls. Adds a decorative element to the floor. |
Using the right ceiling and floor trim can make your RV feel more homely. It ensures that all corners and edges are neatly covered and protected.
Choosing The Right Trim Replacement
Replacing the trim in your RV can make a big difference. It can enhance the look and feel, making your space more inviting and comfortable. But, how do you choose the right trim replacement? Let’s break it down into a few key factors.
Matching Styles And Colors
The first step is to ensure that the new trim matches your RV’s interior style and color. This is crucial for maintaining a cohesive look. Consider the existing furniture, walls, and overall theme of your RV.
A good tip is to take a small piece of your current trim or a photo of your interior. This will help you compare and choose the best matching trim. Whether you prefer a modern look or a classic feel, consistency is key.
Durability And Maintenance
Durability is another important factor. You want a trim that can withstand the rigors of travel and daily use. Look for materials that are known for their strength, such as hardwood or high-quality plastic.
Consider how easy it is to clean and maintain the trim. Some materials might look great but require more upkeep. For a low-maintenance option, choose trims that are resistant to stains and scratches.
| Material | Durability | Maintenance |
|---|---|---|
| Hardwood | High | Moderate |
| Plastic | Medium | Low |
| Metal | High | High |
In conclusion, finding the right RV interior trim replacement involves considering both style and durability. By paying attention to these factors, you can ensure a beautiful and long-lasting upgrade.
Tools Needed For Trim Replacement
Replacing the interior trim in your RV can be a rewarding project. The right tools make the job much easier. Whether you are updating worn-out trim or changing the style, having the correct equipment is essential. This section will guide you through the tools needed for trim replacement to ensure your project goes smoothly.
Essential Tools
To start your RV interior trim replacement, you need the following essential tools:
- Measuring Tape: For accurate measurements of the trim pieces.
- Utility Knife: To cut the trim to the required lengths.
- Hammer: For nailing the trim into place.
- Nail Gun: Speeds up the process and ensures secure attachment.
- Level: Keeps your trim straight and aligned.
- Adhesive: Helps in sticking the trim securely.
- Sandpaper: Smoothens rough edges for a polished finish.
- Paint or Stain: Matches the trim with your RV’s interior.
Safety Equipment
Ensure you have the necessary safety equipment to protect yourself during the trim replacement process:
- Safety Glasses: Protects your eyes from dust and debris.
- Gloves: Prevents cuts and abrasions when handling tools and trim.
- Dust Mask: Keeps you from inhaling sawdust and other particles.
- Ear Protection: Shields your ears from loud noises produced by tools.
Having these safety items ensures you can work comfortably and safely.
| Tool | Purpose |
|---|---|
| Measuring Tape | Accurate measurements |
| Utility Knife | Cutting trim |
| Hammer | Nailing trim |
| Nail Gun | Secure attachment |
| Level | Aligning trim |
| Adhesive | Sticking trim |
| Sandpaper | Smoothing edges |
| Paint or Stain | Matching interior |
With these tools and safety equipment, you are set to start your trim replacement project. Remember, having the right tools makes any job easier and safer.
Diy Vs Professional Installation
Replacing your RV interior trim can transform your living space. You might be wondering whether to do it yourself or hire a professional. Each option has its benefits and drawbacks. Let’s dive into the pros and cons of each approach.
Pros And Cons Of Diy
Doing it yourself can be very rewarding and cost-effective. Here are some pros and cons:
| Pros | Cons |
|---|---|
| Save money on labor costs. | Time-consuming, especially for beginners. |
| Learn new skills. | Requires specific tools and materials. |
| Personal satisfaction from the work. | Risk of mistakes and poor finish. |
When To Hire A Professional
Sometimes, hiring a professional is the best choice. Here are situations where you should consider it:
- Lack of time: If your schedule is tight, a professional can get the job done quickly.
- No experience: If you have no experience with carpentry or DIY projects, you might find the task overwhelming.
- Complex projects: For intricate designs or high-quality finishes, a professional’s expertise can make a big difference.
- Tools and equipment: Professionals have specialized tools and equipment that ensure a better finish.
Choosing between DIY and professional installation depends on your skills, time, and the complexity of the project. Evaluate both options carefully to make the best choice for your RV interior trim replacement.
Step-by-step Trim Replacement Guide
Replacing the interior trim of your RV can refresh its look. This step-by-step guide will help you through the process. Follow these easy steps for a successful trim replacement.
Preparation And Removal
First, gather all necessary tools and replacement parts. You will need a pry bar, screws, and a screwdriver. Ensure you have the right trim pieces for your RV model.
Next, remove the old trim carefully. Use the pry bar to gently lift the trim away from the wall. Be cautious to avoid damaging the wall. Remove any screws holding the trim in place.
Once the old trim is removed, clean the area. Remove any remaining adhesive or debris. This ensures a smooth surface for the new trim.
Installation Tips
Before installing the new trim, measure the area. Cut the trim pieces to the correct size. Use a saw or trim cutter for precise cuts.
Apply a thin layer of adhesive to the back of the trim. Press the trim firmly against the wall. Hold it in place for a few seconds.
Secure the trim with screws. Use a screwdriver to tighten the screws. Make sure the trim is firmly attached to the wall.
Finally, check for any gaps. Fill them with caulk for a clean finish. This will give your RV a polished look.
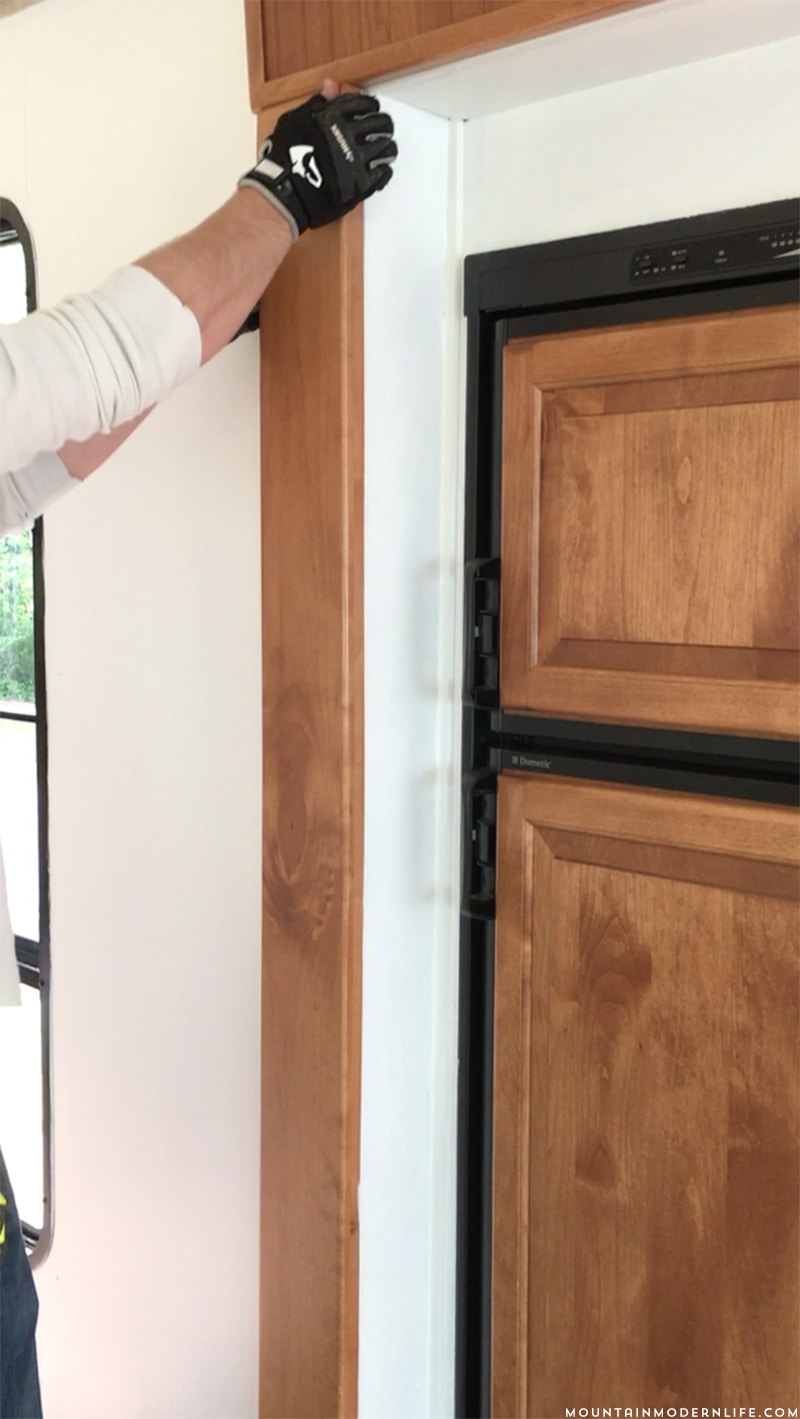
Credit: mountainmodernlife.com
Maintenance Tips For New Trim
Replacing the interior trim in your RV can breathe new life into your space. It makes your RV feel fresh and updated. But, maintaining this new trim is essential. Proper care ensures it stays in great shape for years. Below are some maintenance tips to keep your new trim looking its best.
Regular Cleaning
Clean the trim often to prevent dirt buildup. Dust and grime can damage the material. Use a soft cloth and mild cleaner. Avoid harsh chemicals that could cause discoloration. Wipe down the trim at least once a week. Pay attention to corners and edges where dust collects.
Preventing Damage
Avoid hitting the trim with hard objects. Scratches and dents can ruin the look. Be careful when moving furniture or equipment. Use corner protectors to shield vulnerable areas. These simple steps can prevent costly repairs.
Also, control the humidity inside your RV. High humidity can warp the trim. Use a dehumidifier if needed. Keep the temperature steady to avoid stress on the material. Proper ventilation can also help maintain the trim’s condition.
Where To Buy Quality Trim Parts
Finding the right RV interior trim replacement parts can be a daunting task. The quality of these parts can make a huge difference in the look and feel of your RV. This guide will help you identify the best places to buy quality trim parts.
Online Stores
Shopping for RV interior trim replacement parts online offers a wide variety of options. Many websites specialize in RV parts and provide detailed descriptions and reviews.
- Amazon: Amazon has a vast selection of RV trim parts. You can read reviews to ensure quality.
- eBay: eBay is another good option. You can find both new and used parts here.
- RV Parts Nation: This site specializes in RV parts. They offer a wide range of trim options.
Shopping online allows you to compare prices and read reviews from other RV owners. This can help you make an informed decision.
Local Suppliers
Buying from local suppliers has its own set of advantages. You can see and feel the parts before purchasing them.
- RV Dealerships: Many dealerships have a parts department. They often stock common trim parts.
- Hardware Stores: Some larger hardware stores carry RV trim parts. It’s worth checking out.
- Specialty RV Shops: These shops focus only on RVs. They can provide expert advice and a wide selection.
Local suppliers offer immediate availability. You can also get recommendations from experts who understand RVs.
| Supplier | Advantages |
|---|---|
| Amazon | Wide selection, customer reviews |
| eBay | New and used parts, competitive prices |
| RV Parts Nation | Specialized in RV parts |
| RV Dealerships | Expert advice, immediate availability |
| Hardware Stores | Convenient locations, common parts |
| Specialty RV Shops | Wide selection, expert advice |
Whether you choose to shop online or visit a local supplier, ensure you are getting high-quality trim parts. This will enhance the look and durability of your RV interior.
Conclusion And Final Thoughts
Replacing RV interior trim parts enhances the overall look and feel of the space. It ensures a fresh and appealing environment inside your RV. Upgrading trim parts can improve comfort and functionality.
Replacing the interior trim of your RV can make a big difference. It can enhance the look and feel of your space. It also adds value to your vehicle. Let’s look at the key points and why you should consider this upgrade.
Summarizing Benefits
New interior trim improves your RV’s aesthetic appeal. It makes your space look fresh and modern. You can choose from various styles and materials. This allows you to match your personal taste. Quality trim provides better insulation. It helps in maintaining the temperature inside. This can lead to energy savings. It also minimizes noise from outside. Upgraded trim parts are more durable. They last longer and withstand wear and tear. This means fewer replacements and less maintenance.
Encouraging Upgrade
Investing in new trim parts is worth it. It enhances the comfort of your RV. You feel more at home while traveling. Consider the long-term benefits. Improved insulation and durability pay off over time. You get a better-looking and more functional space. Upgrading your RV’s interior trim is a smart choice. It adds value and comfort. Make your travels more enjoyable with this simple change. “`

Credit: www.youtube.com
Frequently Asked Questions
What Are Rv Interior Trim Replacement Parts?
RV interior trim replacement parts include items like moldings, paneling, and decorative trims. These parts are essential for maintaining and upgrading your RV’s interior look.
Why Replace Rv Interior Trim?
Replacing RV interior trim can enhance the look of your RV. It can fix damaged areas and improve overall aesthetics.
Where To Buy Rv Interior Trim Parts?
You can buy RV interior trim parts from RV supply stores. Online retailers like Amazon and eBay also offer a wide selection.
How To Install Rv Interior Trim Parts?
To install RV interior trim parts, measure the area accurately. Cut the trim to size, apply adhesive, and secure it in place.
Conclusion
Updating your RV interior trim can transform your travel experience. New trim parts provide a fresh look and improved functionality. Easy installation means you can do it yourself. Choose quality materials for durability and style. Enjoy your travels in a cozy and well-maintained RV.
Investing in the right trim parts enhances comfort and aesthetics. Happy travels and safe adventures!


