Carrier RV air conditioners can face issues, just like any other appliance. Troubleshooting these problems is crucial to stay cool on the road.
Whether you’re on a summer road trip or living the RV life full-time, a working air conditioner is a must. But what happens when it stops working? Knowing how to troubleshoot your Carrier RV air conditioner can save you time, money, and stress.
This guide will help you identify common problems and offer solutions. From simple fixes to more complex issues, you’ll find the information you need to get your air conditioner running smoothly again. Stay cool and enjoy your travels with a well-functioning AC system.
Basic Troubleshooting Steps
Having trouble with your Carrier RV air conditioner? Basic troubleshooting can often solve the problem. Follow these steps to get your air conditioner back in working order.
Checking Power Supply
The first step in troubleshooting is to check the power supply. Ensure the unit is plugged in and receiving power. Power issues can cause the unit to stop working.
| Step | Action |
|---|---|
| 1 | Check the power cord for damage. |
| 2 | Ensure the outlet is working by plugging in another device. |
| 3 | Check the circuit breaker. Reset if needed. |
Inspecting The Thermostat
The next step is to inspect the thermostat. The thermostat controls the air conditioner’s operation. A malfunctioning thermostat can cause the unit to run improperly.
- Ensure the thermostat is set to the correct mode (cooling).
- Check the temperature setting. Set it to a lower temperature.
- Inspect the thermostat for loose or corroded wires.
If the thermostat is battery-operated, check the batteries. Replace if necessary.
By following these basic troubleshooting steps, you can identify common issues with your Carrier RV air conditioner. This will help you maintain a comfortable environment in your RV.

Credit: m.youtube.com
Cooling Problems
Experiencing cooling problems with your Carrier RV air conditioner? Don’t worry, you’re not alone. Many RV owners face this issue. It can be frustrating when your air conditioner fails to cool properly. But understanding the common causes can help you troubleshoot effectively.
Low Refrigerant Levels
One common cause of cooling problems is low refrigerant levels. Refrigerant is crucial for the cooling process. Without enough refrigerant, your AC can’t cool effectively. This issue often occurs due to leaks. Over time, small leaks can cause the refrigerant to deplete. To fix this, check for visible leaks. If you find any, seal them and refill the refrigerant. This should restore the cooling efficiency of your AC.
Blocked Air Filters
Blocked air filters can also cause cooling problems. Air filters trap dust and debris. Over time, they get clogged. This restricts airflow and reduces cooling efficiency. To fix this issue, inspect your air filters regularly. If they appear dirty, clean or replace them. Clean filters ensure smooth airflow and optimal cooling performance. Regular maintenance can prevent this issue from recurring.
Noisy Operation
Experiencing a noisy RV air conditioner can be frustrating. A loud unit can disturb your peace and make travel uncomfortable. Understanding the causes helps in addressing the noise issue effectively.
Loose Components
Loose components are a common cause of noise in RV air conditioners. Screws and bolts can become loose over time. This may happen due to vibrations while driving. Regularly check and tighten all screws and bolts. Ensure that the mounting hardware is secure. Loose components can rattle and make a lot of noise.
Fan Motor Issues
The fan motor can also be a source of noise. If the fan blades are bent or damaged, they can create a loud sound. Inspect the fan blades for any signs of damage. Replace damaged blades to reduce noise. The motor itself may also need lubrication. A dry motor can make squeaking or grinding noises. Applying a few drops of motor oil can solve this issue. If the noise persists, the motor may need replacement.
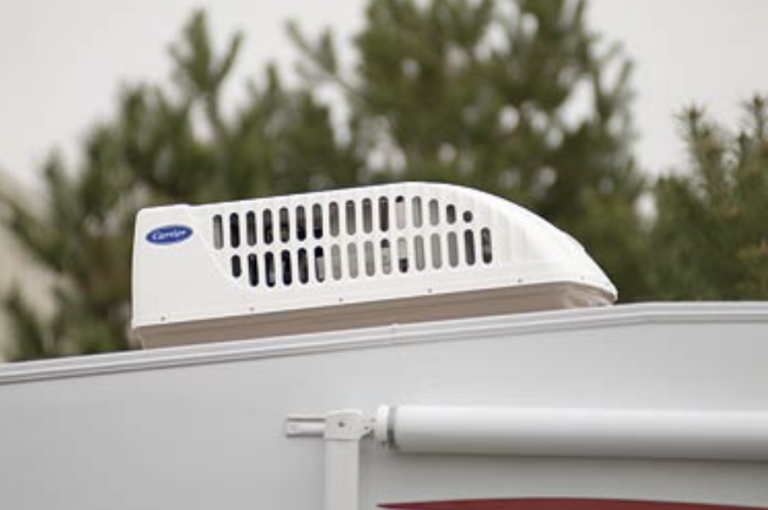
Credit: rvshare.com
Water Leakage
Water leakage in your Carrier RV air conditioner can be a major nuisance. It can damage your RV’s interior and lead to costly repairs. Understanding the common causes of water leakage can help you prevent it. Let’s explore two main reasons for water leakage: a clogged drainage system and improper installation.
Clogged Drainage System
A clogged drainage system is a common cause of water leakage. The drainage system is designed to carry away condensation from the unit. If it’s blocked, water will back up and leak inside your RV.
Regular maintenance can prevent clogs. Check the drainage line for dirt and debris. Use a soft brush or compressed air to clear any blockages. Keeping the drainage system clean ensures proper water flow.
Improper Installation
Improper installation can also lead to water leakage. If the air conditioner isn’t installed correctly, it may not be level. This can cause water to pool and leak inside your RV.
Ensure your air conditioner is installed according to the manufacturer’s instructions. A level unit allows water to drain away properly. If you’re unsure, hire a professional to check the installation.
Electrical Issues
Dealing with electrical issues in your Carrier RV air conditioner can be daunting. Yet, understanding the common problems can help. This section will cover two main areas: blown fuses and faulty wiring. These are typical causes of electrical issues in RV air conditioners.
Blown Fuses
Blown fuses are a common issue. Check the fuse box if your AC stops working. A blown fuse cuts power to the unit. Replacing the fuse can fix the problem. Always keep spare fuses in your RV. It helps avoid delays in fixing the AC.
Faulty Wiring
Faulty wiring is another frequent problem. Loose or damaged wires can stop your AC from working. Inspect the wires regularly. Look for signs of wear or damage. If you find any issues, replace the wires. Secure connections are crucial for proper function. Faulty wiring can also be a fire hazard. Address it promptly for safety.
Maintenance Tips
Maintaining your Carrier RV air conditioner can extend its lifespan and improve performance. Regular maintenance prevents costly repairs and ensures consistent cooling. Here are some essential maintenance tips for your RV air conditioner.
Regular Cleaning
Cleaning the filters of your Carrier RV air conditioner is crucial. Dust and debris can clog the filters. This reduces airflow and efficiency. Clean the filters every two weeks during peak usage. Remove the filters and wash them with mild soap and water. Let them dry completely before reinstalling.
The condenser coils also need regular cleaning. Dirt on the coils can hinder heat exchange. Use a soft brush to remove dust and debris. For stubborn dirt, use a coil cleaner. Always follow the manufacturer’s instructions.
Professional Servicing
Even with regular cleaning, professional servicing is important. A trained technician can check for issues you might miss. Schedule a professional service at least once a year. They will inspect the refrigerant levels and electrical components. They will also check the overall system performance.
Professional servicing ensures your air conditioner runs efficiently. It helps in early detection of potential problems. This can save you from unexpected breakdowns. Regular maintenance by professionals can extend the lifespan of your unit.
When To Seek Professional Help
RV air conditioners are vital for comfort during trips. They sometimes fail, causing discomfort. Knowing when to seek professional help is important. This section guides you on major issues and finding reliable technicians.
Identifying Major Problems
Some issues need professional attention. If the AC does not cool, it may have a refrigerant leak. Strange noises could signal a mechanical problem. Water dripping inside suggests blocked drainage. These issues need expert diagnosis.
Finding A Reliable Technician
Search online for RV AC repair specialists. Check reviews and ratings. Ask fellow RV owners for recommendations. Ensure the technician has experience with RV air conditioners. Confirm they use genuine parts. Reliable technicians save time and money.
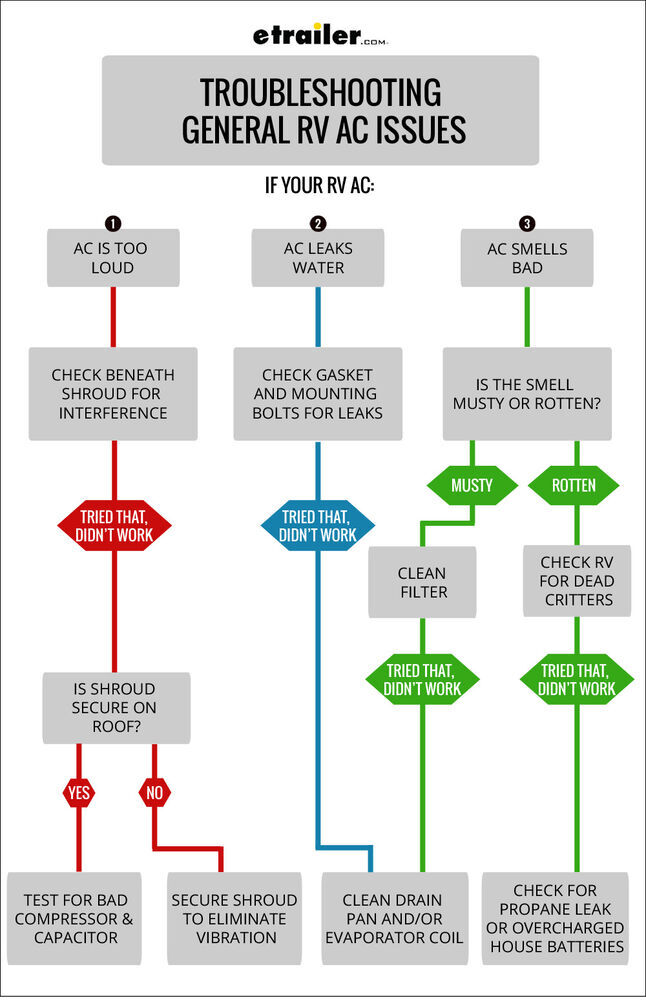
Credit: www.etrailer.com
Frequently Asked Questions
Why Is My Carrier Rv Ac Not Cooling?
If your Carrier RV AC isn’t cooling, check the thermostat settings and clean the filters. Ensure the power supply is stable. Inspect for refrigerant leaks. If problems persist, consult a professional.
How Do I Reset My Carrier Rv Air Conditioner?
To reset your Carrier RV air conditioner, turn off the unit and disconnect power for 5 minutes. Reconnect power and turn the unit on. This should reset the system.
What Causes Carrier Rv Ac To Freeze Up?
A frozen Carrier RV AC can result from dirty filters, blocked airflow, or low refrigerant. Ensure filters are clean and airflow is unobstructed. Check for refrigerant leaks and get them fixed by a professional.
How Often Should I Service My Carrier Rv Ac?
Service your Carrier RV AC at least once a year. Regular maintenance ensures optimal performance. Clean filters and inspect the unit for any issues. Professional servicing can prevent major problems.
Conclusion
Troubleshooting your Carrier RV air conditioner can be straightforward. Follow simple steps to identify issues. Regular maintenance helps prevent problems. Clean filters and check for leaks often. Use the manual for specific guidance. Seek professional help if problems persist. Keeping your AC in good shape ensures comfort on your travels.
A well-maintained air conditioner enhances your RV experience. Enjoy cool and hassle-free adventures!


