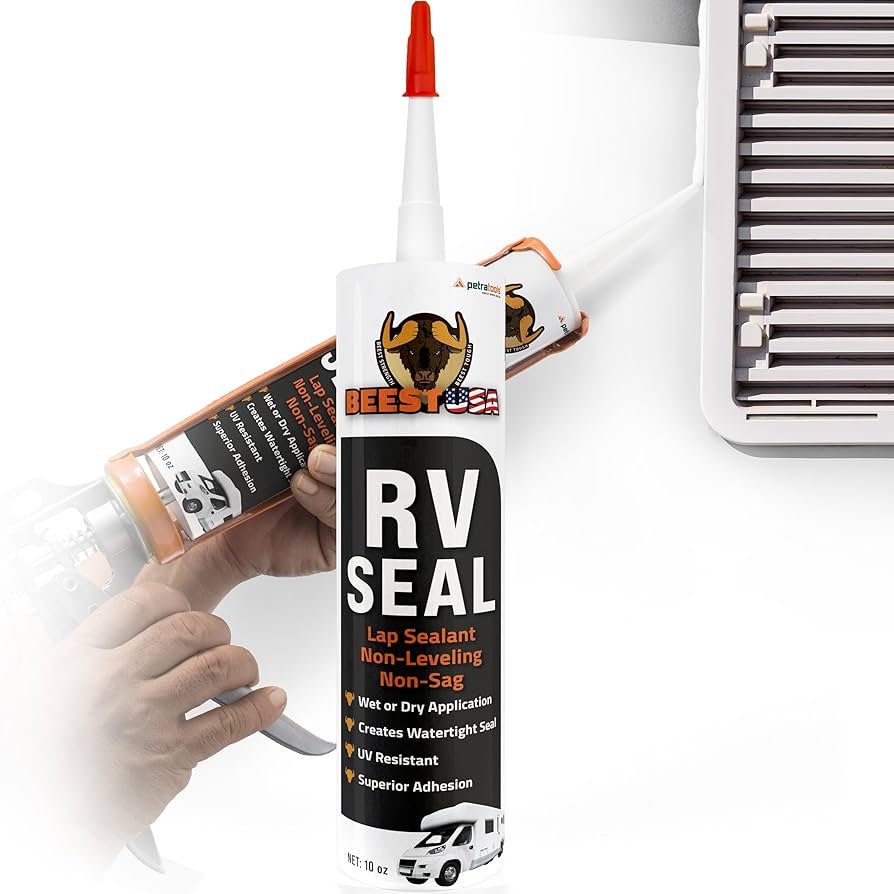
Keeping your RV in top shape requires the right sealant. RV sealant for vertical surfaces is crucial for preventing leaks and damage.
RV owners know the importance of a good sealant. It protects your vehicle from water and weather. But not all sealants work well on vertical surfaces. That’s where specialized RV sealants come in. They are designed to stick and stay in place, even on the sides of your RV.
This blog will guide you through the essentials of choosing the right RV sealant for vertical surfaces. Learn about the benefits, application tips, and why it’s a must-have for every RV owner. Stay tuned to protect your RV and enjoy worry-free travels.

Credit: www.ebay.com
Importance Of Rv Sealant
Maintaining an RV involves various tasks, but applying the right sealant is crucial. RV sealants play a key role in preserving the condition of your vehicle. They protect against leaks, cracks, and other damage.
Prevention Of Water Damage
Water damage can wreak havoc on an RV. Sealants for vertical surfaces offer a strong barrier. This prevents water from seeping into the RV’s structure. Without proper sealing, water can enter through cracks and seams. This leads to mold, mildew, and structural damage. Regularly applying RV sealant helps keep the interior dry and safe.
Enhancing Durability
Sealants also enhance the durability of the RV. They protect against harsh weather conditions. UV rays, rain, and snow can cause wear and tear over time. A good sealant extends the lifespan of the RV’s exterior. It maintains the integrity of the walls and roof. This means fewer repairs and a longer-lasting vehicle.
Types Of Rv Sealants
Choosing the right RV sealant is crucial for maintaining your vehicle. Different sealants are designed for specific purposes. Understanding the types available helps you make the best choice for your RV.
Silicone-based Sealants
Silicone-based sealants are popular for vertical surfaces. They offer excellent flexibility and durability. These sealants are resistant to UV rays and extreme weather. This makes them ideal for outdoor use. They also adhere well to various surfaces. This includes metal, glass, and plastic. Silicone-based sealants dry quickly and form a waterproof barrier. They are perfect for sealing windows and doors.
Polyurethane Sealants
Polyurethane sealants are another excellent choice. They provide strong adhesion and flexibility. These sealants can withstand vibration and movement. This makes them suitable for RVs on rough roads. Polyurethane sealants are also resistant to chemicals and solvents. They offer long-lasting protection against leaks. These sealants are often used for seams and joints. They bond well with different materials, including wood and metal.
Choosing The Right Sealant
Choosing the right sealant for vertical surfaces in your RV is crucial. Proper sealant prevents leaks and damage. It ensures your RV remains in top condition. But how do you pick the best one? Consider key factors like climate and material compatibility.
Climate Considerations
Climate plays a significant role in sealant choice. In hot climates, some sealants may crack. In colder areas, they may become brittle. Choose a sealant designed for your specific climate. This ensures durability and effectiveness.
Material Compatibility
Different RV surfaces require different sealants. Metal surfaces need a specific type. Fiberglass or rubber surfaces need another. Check the sealant label for material compatibility. Using the wrong sealant can cause damage.

Credit: www.ebay.com
Preparing Vertical Surfaces
Proper preparation ensures long-lasting results when applying RV sealant on vertical surfaces. The right techniques prevent leaks and damage, keeping your RV in top condition. Let’s explore the essential steps for preparing vertical surfaces before sealant application.
Cleaning Techniques
First, clean the surface thoroughly. Removing dirt, grease, and old sealant is crucial. Use a mild detergent mixed with water. Scrub the area with a soft brush. Rinse with clean water and let it dry completely.
For stubborn stains or residues, consider using a specialized RV cleaner. Avoid using harsh chemicals. They can damage the surface. A clean surface ensures the sealant adheres properly.
Surface Priming
Once the surface is clean and dry, the next step is priming. Priming helps the sealant bond better. It also adds an extra layer of protection. Choose a primer compatible with your sealant.
Apply a thin, even layer of primer. Use a brush or roller for even coverage. Allow the primer to dry completely. Drying time may vary, so check the manufacturer’s instructions. Once the primer is dry, the surface is ready for sealant application.
Proper preparation is key for a successful sealant application. Clean and prime your surfaces well to ensure a lasting, leak-free seal.
Application Process
Applying RV sealant on vertical surfaces can seem daunting. With the right tools and a clear guide, the process becomes manageable and straightforward. Follow the steps below to ensure a proper seal, preventing leaks and maintaining your RV’s integrity.
Tools Needed
- RV sealant
- Caulking gun
- Utility knife
- Rags
- Mineral spirits or a suitable cleaner
- Painter’s tape
- Gloves
- Safety glasses
Step-by-step Guide
Prepare the Surface
Clean the area with mineral spirits or a suitable cleaner. Remove old sealant with a utility knife. Ensure the surface is dry before applying the new sealant.
Apply Painter’s Tape
Use painter’s tape to outline the area where you will apply the sealant. This helps in keeping the application neat and prevents mess.
Load the Caulking Gun
Insert the RV sealant tube into the caulking gun. Cut the tip at a 45-degree angle to control the flow of sealant.
Apply the Sealant
Squeeze the trigger gently and apply the sealant along the seam or crack. Move the gun steadily to ensure an even application.
Smooth the Sealant
Use a wet finger or a smoothing tool to smooth the sealant. This ensures it fully covers the gap and adheres well to the surface.
Remove the Tape
Carefully remove the painter’s tape while the sealant is still wet. This leaves a clean, professional-looking seal.
Let It Cure
Allow the sealant to cure as per the manufacturer’s instructions. This typically takes 24 to 48 hours.
Following these steps ensures a proper seal, extending the life of your RV. Regular maintenance helps prevent costly repairs and keeps your vehicle in top condition.
Common Mistakes To Avoid
Applying RV sealant on vertical surfaces can be tricky. Many people make mistakes that affect the sealant’s performance. Knowing the common mistakes helps you avoid them and ensures a strong, lasting seal.
Incorrect Application
One common mistake is incorrect application. Many people apply too much or too little sealant. Both can cause issues. Too much sealant can create a mess and waste material. Too little sealant may not provide a proper seal.
Apply the sealant evenly. Use a steady hand and ensure a consistent bead. This helps in achieving a clean and effective seal.
Ignoring Drying Time
Another mistake is ignoring drying time. Each sealant has a specific drying time. Many people rush the process. This can lead to weak seals or incomplete drying.
Allow the sealant to dry as per the instructions. Be patient. This ensures the sealant cures properly and provides a lasting seal.
Maintenance Tips
Keeping your RV in top shape requires regular maintenance. When it comes to RV sealant for vertical surfaces, proper care is key. Follow these simple tips to ensure your RV stays in great condition.
Regular Inspections
Check your RV’s sealant every few months. Look for cracks, gaps, or any signs of wear. Pay special attention to areas exposed to the elements. Spotting issues early can prevent bigger problems.
Reapplying Sealant
If you notice damage, reapply the sealant. Clean the area first to remove dirt and old sealant. Use a suitable RV sealant for vertical surfaces. Follow the manufacturer’s instructions for the best results. Apply the sealant in a smooth, even layer. Allow it to cure completely before exposing it to water.
Benefits Of Proper Sealing
Proper sealing of your RV is crucial. It protects against water damage and keeps the interior safe. Using the right RV sealant for vertical surfaces helps in various ways. Below, we discuss some key benefits.
Extended Rv Lifespan
Sealing your RV correctly can extend its lifespan. Water leaks can cause significant damage. Proper sealant prevents these leaks. This helps maintain the RV’s structure.
Without sealing, water can infiltrate the walls. This leads to mold and rot. Mold can be harmful to health. Rot can weaken the RV’s frame. Regularly applying sealant avoids these issues.
Improved Aesthetic Appeal
A well-sealed RV looks better. Cracks and gaps make the RV appear old. Sealant fills these gaps. This gives the RV a smooth finish.
Over time, weather can damage the RV’s exterior. Sealant protects against this damage. It keeps the RV looking new. A clean, sealed RV attracts more attention. It also increases resale value.
Frequently Asked Questions
What Is The Best Rv Sealant For Vertical Surfaces?
The best RV sealant for vertical surfaces is a high-quality, non-sagging silicone or polyurethane sealant. These sealants provide excellent adhesion and flexibility, ensuring long-lasting protection against leaks and weather damage.
How Do You Apply Rv Sealant On Vertical Surfaces?
To apply RV sealant, clean the surface thoroughly, cut the sealant tube tip, and apply a consistent bead. Smooth it with a caulking tool or finger for even coverage.
How Often Should Rv Sealant Be Replaced?
RV sealant should be inspected every six months and replaced if it shows signs of cracking, peeling, or deterioration. Regular maintenance extends the sealant’s lifespan.
Can You Use Rv Sealant In Cold Weather?
Yes, some RV sealants are formulated for cold weather application. Always check the manufacturer’s guidelines for the recommended temperature range before application.
Conclusion
Choosing the right RV sealant for vertical surfaces is essential. It prevents leaks and damage. Always select a high-quality product. Ensure proper application for the best results. Your RV’s lifespan can increase with regular maintenance. Happy travels!


