A bad RV battery can ruin your trip. But how do you know if it’s bad?
Knowing the signs of a failing RV battery is crucial. It helps avoid unexpected breakdowns and keeps your adventures smooth. Whether you’re a seasoned RV enthusiast or a newbie, understanding your battery’s health is essential. A healthy battery ensures your lights, appliances, and other essentials work properly.
In this guide, we’ll explore the key indicators of a bad RV battery. From slow charging to strange smells, we’ll cover it all. Stay tuned to learn how to spot these issues early and keep your travels worry-free.
Signs Of A Bad Rv Battery
Recognizing the signs of a bad RV battery can save you from unexpected issues on the road. Understanding these signs can help you prevent being stranded in inconvenient places. Here are some signs to watch out for:
Dimming Lights
If you notice your RV lights are getting dimmer, it might be a sign of a bad battery. Dimming lights often indicate that the battery is not holding a charge as it should. This can happen due to several reasons, such as:
- Old age of the battery
- Corroded connections
- Insufficient charging
Regularly check your light brightness to catch this early. Bright lights mean a healthy battery, while dim lights mean you need to investigate further.
Slow Appliance Performance
Another sign of a bad RV battery is slow appliance performance. Appliances like your fridge, microwave, and TV should work without delays. If you notice they are slower than usual, the battery might be struggling to supply power. Slow performance can be due to:
- Low battery charge
- Battery nearing the end of its life
- Electrical issues within the RV
Check your appliances regularly. If they are not working as expected, it could be your battery.
Testing Voltage Levels
Testing the voltage levels of your RV battery is crucial. It helps determine if your battery is in good condition or needs replacement. Proper voltage levels ensure your RV functions smoothly. Let’s dive into how you can check your battery’s voltage.
Using A Multimeter
A multimeter is a handy tool. It measures voltage, current, and resistance. To check your RV battery, follow these steps:
- Set the multimeter to DC voltage.
- Connect the red probe to the positive terminal.
- Connect the black probe to the negative terminal.
- Read the voltage on the multimeter display.
Ensure the RV is off during this process. This avoids false readings.
Interpreting Results
After measuring, you need to interpret the results. Here is a simple table:
| Voltage (V) | Battery Condition |
|---|---|
| 12.6V – 12.8V | Fully Charged |
| 12.4V – 12.6V | Good |
| 12.2V – 12.4V | Half Charged |
| 12.0V – 12.2V | Low Charge |
| Below 12.0V | Discharged |
If your battery reads below 12.0V, it needs charging or replacement. Keep your battery in the optimal range for best performance.
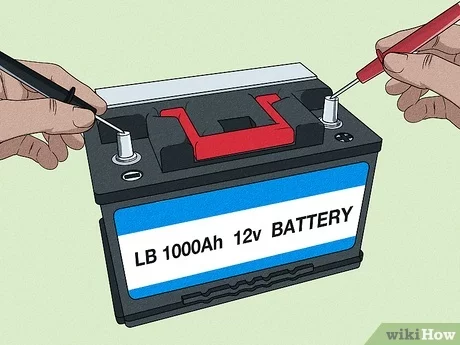
Inspecting Battery Terminals
Inspecting your RV battery terminals is essential for maintaining battery health. Dirty or corroded terminals can lead to poor battery performance. Below are steps to inspect and clean battery terminals.
Corrosion Check
First, check for corrosion on the battery terminals. Corrosion appears as a white, ashy substance. It can also be green or blue if it’s severe. Corrosion hinders the battery’s ability to transmit power. Use a flashlight for better visibility.
- Wear protective gloves and goggles
- Disconnect the battery cables
- Inspect both positive and negative terminals
Cleaning Methods
Cleaning the terminals is crucial for optimal battery performance. Below are effective methods to clean them:
| Method | Steps |
|---|---|
| Baking Soda and Water |
|
| Commercial Battery Cleaner |
|
After cleaning, reconnect the battery cables. Ensure they are tight and secure. Regular inspection and cleaning can extend your RV battery’s life.
Checking For Physical Damage
It is essential to ensure your RV battery is in good condition. Checking for physical damage is a vital step. Physical damage can significantly affect the performance of your battery. Look for visible signs of wear and tear. This will help you determine if your battery needs replacement.
Cracks And Leaks
Inspect the battery case for any cracks. Cracks in the battery case can lead to dangerous leaks. Leaking batteries can damage other parts of your RV. They can also pose serious safety risks. Here’s a simple checklist to follow:
- Examine the sides and bottom of the battery.
- Check around the terminals for any signs of corrosion.
- Look for any liquid around the battery area.
If you see any cracks or leaks, replace the battery immediately. Safety comes first.
Swelling And Bulging
Swelling or bulging is a clear sign of a bad battery. This often happens due to overcharging or extreme temperatures. A swollen battery can fail suddenly. It is hazardous to keep using a swollen battery. Follow these steps to check for swelling:
- Remove the battery from its compartment.
- Place it on a flat surface.
- Inspect all sides for any bulging or unusual shapes.
If you notice any swelling, it is time to get a new battery. Swollen batteries are not safe to use.
Performing A Load Test
Performing a load test is crucial to determine the health of your RV battery. It helps to see if the battery can handle a sustained load. If the battery fails, it might need replacement.
Load Tester Usage
A load tester is needed for this test. First, fully charge the RV battery. Connect the load tester to the battery terminals. Ensure the connections are tight and secure. This will give accurate results.
Set the load tester to apply a load. This simulates the battery working under real conditions. Most testers come with instructions. Follow these to set the correct load for your battery type.
Analyzing Load Test Results
Once the load is applied, monitor the voltage reading. Keep the load on for about 10 seconds. If the voltage drops below 12 volts, the battery may be weak. A healthy battery should stay above 12 volts.
If the voltage drops significantly, the battery might be bad. It could need replacement soon. A high-quality battery should maintain voltage even under load.
Credit: www.renogy.com
Monitoring Charging Efficiency
Monitoring the charging efficiency of your RV battery is crucial. It helps ensure your adventures are not interrupted by a dead battery. This section will guide you on how to check the efficiency of your RV battery by focusing on charge time and holding a charge.
Charge Time
Understanding the charge time of your RV battery is essential. A typical RV battery should take around 4-8 hours to charge fully. If your battery takes longer than usual, it might be a sign of inefficiency.
Make sure to check the charging specifications provided by the manufacturer. Compare the expected charge time with the actual charge time. Here’s a simple table to help you track the charge time:
| Charge Attempt | Start Time | End Time | Total Time |
|---|---|---|---|
| 1 | 08:00 AM | 12:00 PM | 4 hours |
| 2 | 09:00 AM | 05:00 PM | 8 hours |
| 3 | 10:00 AM | 06:00 PM | 8 hours |
If you notice a significant increase in the charge time, it may indicate your battery is deteriorating.
Holding A Charge
The ability of your RV battery to hold a charge is another critical factor. A healthy battery should maintain its charge over a reasonable period, even when not in use. If your battery drains quickly, it might be a sign of a problem.
Perform a simple test to check if your battery holds a charge:
- Fully charge your RV battery.
- Disconnect it from any power source.
- Leave it for 24 hours.
- Check the battery voltage.
A fully charged battery should read around 12.6 volts. If the voltage drops significantly within 24 hours, your battery might be bad.
Keep an eye on these key indicators to ensure your RV battery remains in good condition. Regular monitoring can help prevent unexpected issues during your travels.
Evaluating Battery Age
Evaluating the age of your RV battery is crucial. It helps determine if it’s time for a replacement. Batteries don’t last forever. Understanding their age can prevent unexpected power failures during trips.
Manufacture Date
The manufacture date is an essential piece of information. It tells you how old your battery is. You can find this date on the battery label. Usually, it’s a code of letters and numbers. Decode it to find the exact date. If your battery is over five years old, it’s likely time for a new one.
Typical Lifespan
RV batteries have a typical lifespan. Most last between three to five years. This depends on usage and maintenance. If you use your RV often, expect a shorter lifespan. Regular maintenance can extend battery life. But even with care, batteries degrade over time. If your battery is reaching its typical lifespan, it’s wise to consider a replacement.

Credit: shopsolarkits.com
Maintaining Rv Battery Health
Maintaining RV battery health ensures that your adventures remain uninterrupted. Regular care extends the lifespan of your battery. This helps you avoid unexpected breakdowns. Two main aspects to consider are regular inspection and proper storage.
Regular Inspection
Regularly inspect your RV battery for signs of wear. Look for corrosion on the terminals. Clean any corrosion with a mixture of baking soda and water. Check the battery case for any cracks or bulges. These indicate that the battery may need replacement. Ensure the battery is securely mounted. Loose batteries can cause damage.
Test the voltage of your battery with a multimeter. A fully charged battery should read around 12.6 volts. If the reading is lower, it may need charging or replacement. Regular checks can help you spot issues early. This prevents more severe problems.
Proper Storage
Store your RV battery properly when not in use. Remove the battery from the RV if storing for long periods. Keep it in a cool, dry place. Avoid extreme temperatures, which can damage the battery. Charge the battery to full before storing it. Check the charge every few months. Recharge if necessary.
Use a trickle charger to maintain the charge during storage. This prevents the battery from dying. Proper storage practices ensure your battery is ready for your next trip.

Credit: lifelinebatteries.com
Frequently Asked Questions
How Can You Tell If An Rv Battery Is Bad?
An RV battery is bad if it won’t hold a charge. Check for bulging, leaking, or corrosion around terminals.
What Are Common Symptoms Of A Failing Rv Battery?
Common symptoms include slow cranking, dim lights, or electronics not working. Reduced performance indicates a failing battery.
How Often Should You Test Rv Battery Health?
Test your RV battery health every 3-6 months. Regular testing ensures it functions properly and lasts longer.
Can A Bad Rv Battery Damage Your Rv?
Yes, a bad RV battery can damage your RV’s electrical system. It can lead to costly repairs and inconvenience.
Conclusion
Determining if your RV battery is bad is crucial. Regular checks ensure safety. Look for signs like slow charging or dim lights. Pay attention to your battery’s age and condition. Investing time in maintenance saves money. A well-functioning battery enhances your RV experience.
So, test your battery often and enjoy stress-free travels. Always keep a spare battery handy. Safe travels!


