Removing a jackknife sofa from an RV can seem daunting. But it’s simpler than it looks.
RVs often come with built-in furniture, like jackknife sofas, which save space and add convenience. Sometimes, though, you need more room or want to upgrade your seating. Removing a jackknife sofa can help you achieve that. This process involves a few steps and some basic tools.
We’ll guide you through each step, ensuring you understand what to do. Whether you’re a seasoned RV owner or new to RV living, this guide will help you tackle the task with ease. Ready to get started? Let’s dive in and make your RV space more functional and comfortable.

Credit: rvinspiration.com
Tools And Materials Needed
Removing a jackknife sofa from your RV can seem daunting. But, with the right tools and materials, you can make the job much easier. This section will guide you through the essential tools and required materials you’ll need to complete the task smoothly.
Essential Tools
To remove the jackknife sofa from your RV, gather these tools:
- Screwdriver set
- Wrench set
- Socket set
- Pry bar
- Utility knife
- Work gloves
Required Materials
Besides tools, you’ll need a few materials:
- Drop cloth or tarp
- Zip ties or tape
- Trash bags
- Replacement furniture (if needed)
Having these tools and materials ready will make the removal process simpler. You will save time and avoid frustration. Prepare everything in advance to ensure a smooth experience.
Credit: liveworkdream.com
Preparing The Rv
Preparing the RV for removing the jackknife sofa is crucial. Proper preparation ensures a smooth and efficient process. It also helps prevent any damage to your RV. Let’s dive into the steps you need to take.
Clearing The Area
First, clear the area around the jackknife sofa. Remove any items that might obstruct your work. This includes cushions, blankets, and other personal items. Clearing the area gives you more space to move around. It also reduces the risk of tripping or damaging anything.
Protecting The Floor
Next, protect the floor of your RV. Place a drop cloth or old blanket on the ground. This prevents scratches or dents on the floor. It also makes cleanup easier once the sofa is removed. Be sure to cover a wide area around the sofa.
Disconnecting The Sofa
Disconnecting the sofa from your RV can be a straightforward task if you follow the right steps. This section will guide you through the process of unfastening bolts and detaching the sofa from the wall. Let’s get started on making your RV space more functional.
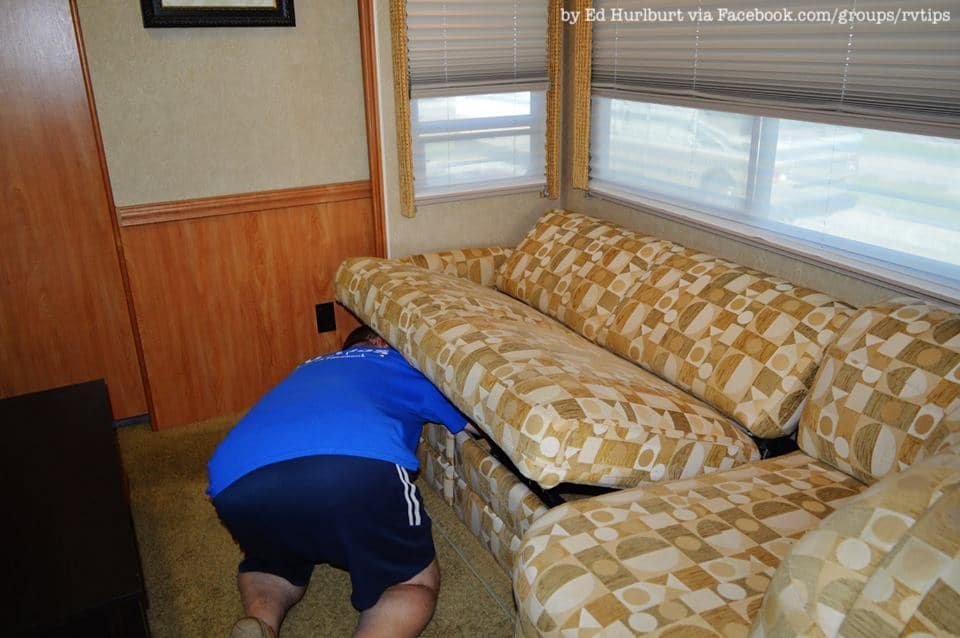
Unfastening Bolts
First, locate the bolts securing the jackknife sofa to the floor. They are usually found underneath the sofa. Use a wrench to loosen and remove these bolts. Ensure you keep the bolts in a safe place for future use.
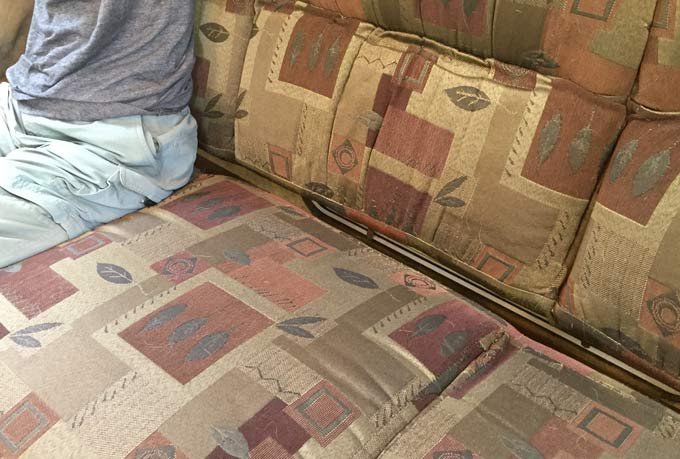
Next, check for any additional bolts attaching the sofa to the RV frame. These might be hidden behind cushions or fabric. Remove them carefully to avoid damaging the sofa or the RV interior.
Detaching From Wall
Once the bolts are removed, focus on detaching the sofa from the wall. Some sofas have brackets or screws securing them to the RV wall. Use a screwdriver to remove these screws. Be cautious to prevent any damage to the wall.
After removing all screws and brackets, gently pull the sofa away from the wall. You might need an extra pair of hands for this step. Ensure you move the sofa carefully to avoid scratching the RV floor.
Now, your jackknife sofa should be free from its attachments, ready to be removed from your RV. Follow these steps, and you’ll have a more flexible space in no time.
Removing The Sofa
Removing a jackknife sofa from your RV can be a daunting task. It takes preparation and careful movement. This section will guide you through the process. Follow these steps to make it easier.
Lifting Safely
Safety first. Always use proper lifting techniques. Bend your knees, not your back. This prevents injury. Use both hands for a firm grip. Wear gloves for better traction and protection.
If the sofa is too heavy, get help. Two people can lift more safely. Communication is key. Lift on the count of three to stay in sync.
Navigating Tight Spaces
RVs have limited space. Plan your route before you lift. Measure doorways and hallways. Remove obstacles in your path. This includes small items and rugs.
Move slowly and carefully. Pivot the sofa to fit through tight spots. Angle it if needed. Take breaks to avoid fatigue. This keeps you and your RV safe.
Dealing With Obstacles
Removing a jackknife sofa from your RV can be tricky. The narrow spaces and tight corners make the task even harder. Dealing with obstacles is a key part of this process. Understanding how to handle these obstacles can save you time and frustration. Let’s break it down step by step.
Handling Doorways
Doorways can be a major challenge. Measure the width of your doorway first. Ensure the sofa can fit through without any issue. If the sofa is wider than the doorway, you might need to disassemble it.
Steps to handle doorways:
- Remove any removable parts of the sofa.
- Measure the sofa and the doorway.
- If needed, take the sofa apart.
- Angle the sofa carefully through the doorway.
Watch out for door handles and frames. They can snag the sofa and cause damage.
Managing Narrow Hallways
Hallways in RVs are often narrow. This can make moving large furniture difficult. Managing narrow hallways requires careful planning.
Strategies for narrow hallways:
- Clear the hallway of any obstacles.
- Plan your route before moving the sofa.
- Use furniture sliders to protect the floor.
- Have a helper to guide and support the move.
Take your time. Move slowly and avoid sharp turns. This will prevent damage to the sofa and the RV walls.
By following these steps, you can remove your jackknife sofa with ease. Remember, preparation is key. Measure, plan, and move carefully. Happy renovating!
Cleaning The Area
After removing the jackknife sofa from your RV, it is essential to clean the area. This ensures a fresh and tidy space for new furniture or for other purposes. Follow these steps to make your cleaning process efficient and thorough.
Vacuuming Debris
Begin by vacuuming the area thoroughly. Remove any loose debris, dirt, and dust that might have accumulated. Use a vacuum cleaner with an upholstery attachment to reach all corners and crevices. Pay extra attention to the floor, as it can collect a lot of hidden dirt.
Inspecting For Damage
After vacuuming, inspect the area for any damage. Look for scratches, dents, or other signs of wear and tear. Check the floor, walls, and any surrounding furniture. If you find any damage, consider repairing it before placing new furniture or using the space for other purposes.
Disposing Or Repurposing The Sofa
After successfully removing the jackknife sofa from your RV, you might wonder what to do with it next. Whether you plan to dispose of it or give it a new life, there are several eco-friendly and creative options to consider.
Recycling Options
Recycling the old sofa can be a responsible choice. Here are some recycling options to consider:
- Local Recycling Centers: Check with your local recycling center to see if they accept furniture. Some centers have specific drop-off days for bulky items.
- Donation: Donate the sofa to a local charity or thrift store. Many organizations will pick up large items for free.
- Scrap Yards: Metal parts of the sofa can be taken to a scrap yard. This option is suitable if the sofa frame is made of metal.
These recycling options help reduce landfill waste and can benefit others.
Creative Repurposing Ideas
If you enjoy DIY projects, repurposing your sofa can be a fun and rewarding activity. Here are some creative repurposing ideas:
- Outdoor Seating: Transform the sofa into outdoor seating for your patio. Add weatherproof cushions and a fresh coat of paint.
- Daybed: Convert the sofa into a daybed for your guest room. Simply add a twin-sized mattress and some cozy bedding.
- Storage Bench: Remove the backrest and use the base as a storage bench. Perfect for entryways or mudrooms.
Repurposing the sofa not only saves money but also adds a unique touch to your home.
Installing A New Sofa
Removing a jackknife sofa from your RV opens up new possibilities for comfort. Installing a new sofa enhances the living space, making it more inviting. It’s important to choose the right replacement and follow a step-by-step installation process.
Choosing The Right Replacement
Select a sofa that fits the RV space. Measure the available area accurately. Consider the sofa’s weight and size. Choose a model that offers comfort and durability. Look for a design that complements your RV’s interior.
Think about the sofa’s functionality. Some models offer extra storage. Others might convert into beds. Choose one that meets your needs. Read reviews and check ratings to ensure quality.
Step-by-step Installation
Start by removing the old jackknife sofa. Disconnect any attached hardware. Carefully slide the sofa out of the RV. Clean the area where the new sofa will sit.
Next, bring in the new sofa. Align it with the mounting points. Ensure it sits properly in the space. Secure the sofa using the provided hardware.
Test the new sofa for stability. Make sure it is firmly attached. Check for any wobbling or loose parts. Adjust if necessary.
Enjoy your new sofa. It will enhance your RV living experience. Relax and appreciate the comfort it brings. Your RV is now ready for new adventures.
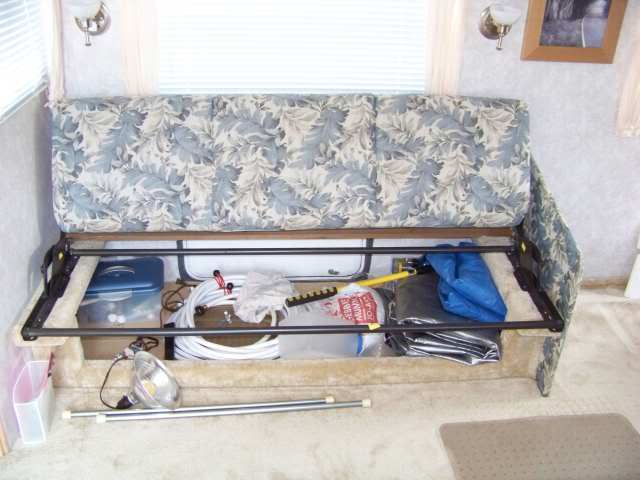
Credit: www.sunlineclub.com
Frequently Asked Questions
How Do I Start Removing A Jackknife Sofa?
Begin by detaching the sofa from its mounting brackets. Use the right tools to unscrew bolts and nuts.
What Tools Are Needed To Remove An Rv Sofa?
You will need a screwdriver, wrench, and potentially a power drill. Ensure you have the right sizes.
Can One Person Remove A Jackknife Sofa?
Yes, but it’s easier with two people. The sofa can be heavy and awkward to handle alone.
Are There Any Wires To Disconnect?
Some sofas may have electrical components. Check for wires and disconnect them carefully before removal.
Conclusion
Removing a jackknife sofa from your RV is straightforward with these steps. Start by gathering the right tools. Carefully unbolt the sofa and lift it out. Remember to protect the RV floor and walls. Enjoy the new space in your RV.
Happy travels and safe adventures!


