RV slide outs are fantastic for extra space but can suffer water damage. Repair costs vary based on severity and materials needed.
Understanding the costs involved in RV slide out water damage repair is crucial for budgeting. Water damage in RV slide outs is common due to leaks or poor sealing. This damage can ruin your travel plans and lead to costly repairs.
Knowing what to expect financially helps in planning and prevents further damage. In this blog post, we’ll explore the factors affecting repair costs, from minor fixes to major overhauls. Whether you’re a seasoned RV owner or new to the lifestyle, this guide will provide valuable insights to keep your slide out in top condition and your wallet intact.

Credit: www.doityourselfrv.com
Identifying Water Damage
Identifying water damage in your RV slide out is crucial. Early detection can save you a lot of money and stress. Water damage can lead to structural issues and mold growth. Both of which can be costly to repair. In this section, we’ll discuss how to identify signs of water damage. You’ll also learn about the tools needed for inspection.
Signs Of Water Damage
Recognizing the signs of water damage is the first step. Here are some common indicators:
- Discoloration: Look for dark or yellowish spots on walls and ceilings.
- Soft Spots: Press gently on walls and floors. Soft spots indicate water damage.
- Mold and Mildew: Check for black, green, or white patches.
- Musty Odor: A persistent musty smell is a sign of mold.
- Warping: Notice any warping of wood or materials.
Tools For Inspection
Proper tools make the inspection easier and more accurate. Here are some essential tools:
| Tool | Description |
|---|---|
| Moisture Meter | Measures moisture levels in materials. Essential for detecting hidden water damage. |
| Flashlight | Helps you see into dark corners and under furniture. |
| Screwdriver | Used to remove panels and access hidden areas. |
| Camera | Document damage for insurance or repair estimates. |
| Inspection Mirror | Helps you see behind and under difficult-to-reach areas. |
Using these tools, you can effectively identify water damage. Early detection can save you from costly repairs. Stay vigilant and inspect your RV slide out regularly.

Credit: www.youtube.com
Immediate Steps To Take
Discovering water damage in your RV slide out can be overwhelming. Acting quickly is vital to prevent further damage and expensive repairs. Here are the immediate steps to take when you notice water damage in your RV slide out.
Drying The Area
The first step is to dry the affected area. Use a towel to soak up any standing water. Then, use a wet/dry vacuum to remove moisture from carpets and fabrics. Set up fans around the area to help with drying. You may also use a dehumidifier to reduce moisture in the air.
Preventing Further Damage
After drying the area, inspect the slide out for leaks. Check seals and gaskets for damage. Replace any damaged seals immediately to prevent more water from entering. Consider using a waterproof sealant around the slide out edges for extra protection.
Next, check the slide out mechanism. Ensure it operates smoothly without any obstructions. If you find any damage to the mechanism, it’s best to consult a professional for repairs.
| Task | Estimated Cost |
|---|---|
| Drying the Area | $50 – $150 |
| Replacing Seals | $100 – $300 |
| Professional Inspection | $100 – $200 |
By following these immediate steps, you can minimize the damage and reduce repair costs. Remember to act quickly and efficiently to protect your RV investment.
Assessing Repair Needs
Water damage to an RV slide-out can be stressful and costly. Proper assessment of the damage is crucial. This step helps determine the extent of repairs needed and the associated costs. By understanding the level of damage, you can plan better and avoid surprises.
Extent Of The Damage
The first step is to evaluate the extent of the water damage. Check for visible signs like staining, warping, or mold. Use a moisture meter to detect hidden water in walls or floors. The extent of the damage will influence the repair cost.
| Damage Type | Visible Signs |
|---|---|
| Staining | Discoloration on walls or ceilings |
| Warping | Uneven surfaces or bulging areas |
| Mold | Black spots or musty smell |
Types Of Repairs Required
Once the damage is assessed, identify the types of repairs needed. This can range from minor fixes to major overhauls. Here are common repair types:
- Sealing leaks
- Replacing damaged panels
- Fixing or replacing insulation
- Addressing mold issues
Minor repairs like sealing leaks might be less costly. Major repairs, like replacing panels, can be more expensive. Knowing the types of repairs helps in estimating the overall repair cost.

Credit: bkamericanodyssey.com
Diy Repair Options
Dealing with RV slide out water damage can be a daunting task. The repair costs can be high. But, DIY repair options can save you money. If you have basic skills and the right tools, you can fix it yourself.
Necessary Materials
Before starting your repair, gather all the necessary materials. Here is a list of what you will need:
- Waterproof sealant
- Replacement wood (if needed)
- Putty knife
- Screwdriver
- Sandpaper
- Pry bar
- Caulk gun
- Protective gloves
Step-by-step Guide
Follow this step-by-step guide to repair your RV slide out water damage:
- Inspect the Damage: Check for any signs of water damage. Look for soft spots, mold, or discoloration.
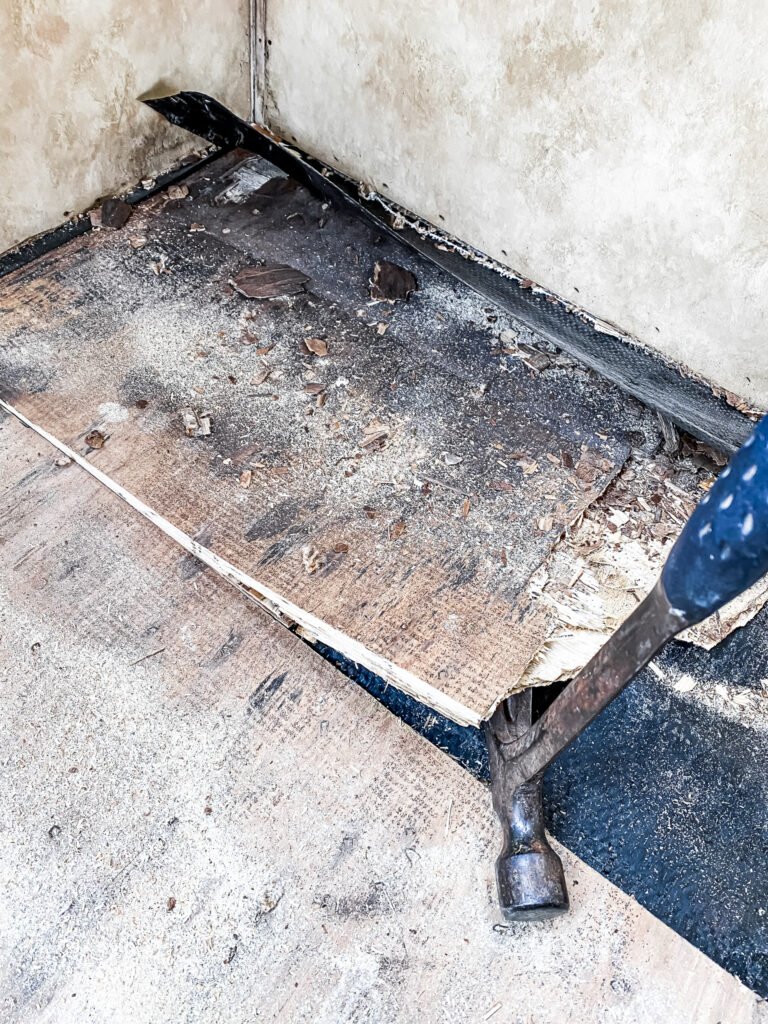
- Remove Damaged Parts: Use a screwdriver to remove any damaged wood or panels. Be careful not to damage any undamaged parts.
- Dry the Area: Use a fan or dehumidifier to dry the area completely. This helps prevent mold growth.
- Sand the Area: Use sandpaper to smooth out any rough edges. This will help the new materials adhere better.
- Apply Sealant: Use a waterproof sealant to cover any cracks or gaps. This helps to prevent future water damage.
- Replace Damaged Wood: Cut replacement wood to fit the damaged area. Use a putty knife to apply adhesive, then press the wood into place.
- Reassemble: Once everything is dry and secure, reassemble the slide out. Ensure all screws and panels are tight.
- Test: Open and close the slide out to ensure it functions properly. Check for any leaks or issues.
By following these steps, you can repair RV slide out water damage. This DIY method is cost-effective and can extend the life of your RV.
When To Call A Professional
Consider calling a professional for RV slide out water damage repair. Expert help ensures proper assessment and cost-effective solutions. Avoid further damage by addressing issues promptly.
RV slide-out water damage can be tricky. Sometimes, you may manage small repairs yourself. But, there are times when calling a professional is the best choice. This section explains when to seek expert help.Complex Repairs
Some repairs are too complex for DIY. Structural damage or extensive water damage needs professional attention. Fixing the frame or replacing large sections of wood requires skill. Improper repairs can lead to more damage.Finding A Reliable Technician
Choosing the right technician is crucial. A skilled and reliable technician ensures quality work. Here are some tips to find one:- Ask for recommendations from RV owners.
- Check online reviews and ratings.
- Verify certifications and experience.
- Get detailed cost estimates before hiring.
Cost Breakdown
Understanding the costs involved in repairing RV slide out water damage is crucial. This breakdown will help you plan your budget better. We’ll focus on the major expenses: material costs and labor costs.
Material Costs
Material costs vary based on the extent of the damage. Common materials include wood, sealants, and insulation. Wood is often needed to replace rotted sections. Sealants are essential to prevent future leaks. Insulation may need to be replaced if it has absorbed water. The type of materials you choose will affect the cost.
Prices can range from $50 to $500. High-quality materials cost more but last longer. Choosing durable materials can save money in the long run.
Labor Costs
Labor costs depend on the complexity of the repair. Simple repairs may take a few hours. Complex damage requires more time and expertise. Labor rates vary by region and technician experience. Rates can range from $50 to $150 per hour.
It’s important to get multiple quotes. Comparing quotes helps you find the best price. Ensure the technician has experience with RVs. This ensures the repair is done correctly.
Preventive Measures
Preventing water damage in RV slide outs can save you time and money. Simple measures can keep your RV in good shape and extend its life. In this section, we’ll discuss important preventive measures.
Regular Maintenance
Regular maintenance is crucial for preventing water damage. Inspect seals and seams every few months. Look for cracks or gaps where water could enter. Clean the slide out roof to remove debris. Leaves and dirt can trap moisture, leading to damage. Lubricate the slide out mechanisms. This ensures smooth operation and prevents wear and tear.
Waterproofing Techniques
Waterproofing your RV slide out is essential. Use high-quality sealants on seams and edges. These sealants provide a strong barrier against water. Apply a waterproof coating to the slide out roof. This extra layer of protection repels water effectively. Install slide out awnings. Awnings help divert rainwater away from the slide out. They also provide shade, reducing heat buildup inside the RV.
Insurance Considerations
RV slide out water damage can be costly. Insurance can help ease this burden. Understanding your insurance options and how to file a claim is crucial.
Coverage Options
Not all insurance policies cover water damage. Check your policy to see what’s included. Here are some common coverage options:
- Comprehensive Coverage: Covers water damage from external sources like rain.
- Collision Coverage: Covers damage from accidents.
- Full Coverage: Often includes both comprehensive and collision coverage.
Contact your insurance provider for specific details. Ensure you understand the terms and limits of your coverage.
Filing A Claim
Filing a claim can be a straightforward process. Follow these steps:
- Document the Damage: Take photos and videos of the water damage.
- Contact Your Insurer: Call your insurance company to report the damage.
- Fill Out Claim Forms: Complete any required paperwork.
- Meet with an Adjuster: An adjuster may inspect your RV.
- Get Repair Estimates: Obtain estimates from RV repair shops.
- Submit Documentation: Send all forms and estimates to your insurer.
Stay in touch with your insurance company. Follow up if needed to ensure your claim is processed promptly.
Frequently Asked Questions
What Causes Rv Slide Out Water Damage?
RV slide out water damage is often caused by leaks. These leaks can come from faulty seals, poor maintenance, or exposure to harsh weather.
How Do I Detect Water Damage In My Rv Slide Out?
Detecting water damage involves checking for soft spots, discoloration, or mold. Also, inspect seals and look for any signs of leaks.
Can I Repair Rv Slide Out Water Damage Myself?
Yes, you can repair minor water damage yourself. Ensure you identify the source, fix leaks, and replace damaged materials promptly.
How Much Does Rv Slide Out Water Damage Repair Cost?
The repair cost varies. It can range from a few hundred to several thousand dollars, depending on the damage extent.
Conclusion
Fixing RV slide-out water damage can be costly, but it’s essential. Regular maintenance can help prevent these issues. Address small leaks immediately to avoid bigger problems. Seek professional help when needed. Protect your investment and enjoy your travels. Stay proactive and keep your RV in top shape.
This ensures a smoother, more enjoyable journey. Safe travels!


